PROFESSIONAL VIDEO PRODUCTION (Course)
In the 21st century, many companies require advanced visual communications to connect and spread information about their products and services to the rest of the world. Visual communication is a skill that is both essential and in demand. This course focuses on the specifics of how to use a leading edge camera platform, a DSLR-like camera, to its full potential so that you are then able to succeed in shooting a professional quality video project. The nature of the project, documentary, film, music video, corporate video, business video, educational video, and so on is not what is essential. The core skill of using your camera effectively is something that can be taken with you and applied to make media of any type as required in your future endeavours.
After taking the course, you will be able to shoot any type of video and most importantly, will be able to avoid many of the production mishaps that can happen when doing live recordings of audio and video. Even if you have used many cameras before, in many projects, production is something that must constantly be learned and relearned so as to maintain the skills at high level, and thus ensure every new production is as good or better than the last. Specifically, you will also learn about the pre-production, production, and post-production process. You will learn about directing, camerawork, lighting, video editing, sound editing, and other key aspects to media creation. Remember, these skills will help you to become or stay a quality media producer.
The skills will help you connect your vision to the ever increasing number of people in the world who connect visually through smartphones, tablets, laptops, computers and smart TVs. As a media producer, you have the opportunity to reach an ever increasing browsing population in one of the most effective forms, video.
Who should take this course?
This course teaches the foundations of video production. It is a guide for beginners to learn professional video technologies and techniques. It benefits anyone who wants to produce high quality video. The lessons will help beginners to avoid pitfalls and mistakes, which can compromise a production. Intermediate and professional videographers will also benefit from a review of the material.
What will students achieve or be able to do after taking your course?
Students will learn how to plan productions, how to use a DSLR-like camera, how to light a scene and how to perform post-production.
NOTE***: It is both much more engaging and much easier to comprehend the concepts in this course by watching the YouTube videos below, before reading the text passages, for each section.
1 Professional Video Production – Introduction
Lecture 1 – Professional Video Production – Introduction
In the 21st century, many companies require advanced visual communications to connect and spread information about their products and services to the rest of the world. Visual communication is a skill that is both essential and in demand. This course focuses on the specifics of how to use a leading edge camera platform, a DSLR-like camera, to its full potential so that you are then able to succeed in shooting a professional quality video project. The nature of the project, documentary, film, music video, corporate video, business video, educational video, and so on is not what is essential. The core skill of using your camera effectively is something that can be taken with you and applied to make media of any type as required in your future endeavours. After taking the course, you will be able to shoot any type of video and most importantly, will be able to avoid many of the production misshaps that can happen when doing live recordings of audio and video. Even if you have used many cameras before, in many projects, production is something that must constantly be learned and re-learned so as to maintain the skills at high level, and thus ensure every new production is as good or better than the last. Specifically, you will also learn about the pre-production, production, and post-production process. You will learn about directing, camerawork, video editing, sound editing, and other key aspects to media creation. Remember, these skills will help you to become or stay a quality media producer. The skills will help you connect your vision to the ever increasing number of people in the world who connect visually through smartphones, tablets, laptops, computers and smart TVs. As a media producer, you have the opportunity to reach an ever increasing browsing population in one of the most effective forms, video.
Business Video
If you’re taking the course to enhance your professional skills so as to tackle business projects, you will need to keep a few things in mind. First, many clients that need business video aren’t sure how to proceed, and often times, they will settle for an online business presence without even one video. Some go as far as to have a basic picture slideshow. Neither of these solutions are a competitive and satisfactory approach in today’s environment. As the producer, you may have to pitch a video solution to a business, which may not realize they are lacking in their marketing attempts. Second, if in fact they do realize what they need, and they decide they need a business video; you will need to guide them through the process. You will need to figure out what the clients want, their goals and priorities. Lastly, after figuring out what they want, you will need to propose a concept and justify it. As part of this proposal, it is important to make a clear presentation as to what you will provide and what you will not provide, as well as what payments are expected and when.
Production Phases
The three phases of producing video projects are: pre-production, production, and post-production. In pre-production, one prepares and sets-up the production to get going. Amateur producers often disregard this phase, quickly write up a script, and get going on the production. Though this can be quite effective and getting a larger quantity of video produced quickly, the work is very likely to come off as amateurish, and will certainly not be at the professional level required in most endeavours. In production, the actual shooting in the studio or on location will take place. Production includes all of the days of filming. In post-production, the editors for sound and audio edit the best scenes, apply effects, and package the production for distribution.
2 Professional Video Production – Pre-Production
Lecture 2 – Professional Video Production – Pre-Production
Pre-production is the stage of a video project that happens right after the various parties involved agree and decide on the production of a video. It lasts right until the actual filming days start. To someone new to media production, they may erroneously believe that the actual production of the video project would take the most effort, but actually, in terms of time, the pre-production phase is longer and more intricate. In order to get everything in order to film a project, there are many variables that all need to come together. Since most projects are not studio projects, where things such as power, lighting, electrical, and sound can be controlled in detail, the producer in the field really has to rely on the circumstances at hand. Therefore, preparation, risk planning, countermeasures and so forth all need to be employed to foresee and have alternate courses of action planned so as to react to the situations as they present themselves. The production team is often at the mercy of the weather, the punctuality of the cast or crew, the reliability of academic or business partners, the quality of the equipment rented or bought, the willingness of the police or city to go along with proposed plans, the availability of various premises and so on. Planning will allow for a minimization of the risk involved in project managing a complex media project. In the field, the unexpected will happen, whether or not you plan, but the likelihood of success is much higher if the due diligence and thorough project planning has taken place.
Pre-Production Steps
There are quite a few things that need to be completed during the pre-production phase, before you can go on to the production phase. These include
- Script
- Budget, Schedule, Permits & Releases
- Recruitment
- Scouting
- Sets, Blocking
- Costumes, Equipment
3 Professional Video Production – Writing For A Business Video Project
Lecture 3 – Professional Video Production – Writing For A Business Video Project
Whether writing fiction or something with a lot of facts, the writer will first need to collect information from various sources and will then need to do some research on the various topics. In business video projects, it can be hard to compile all of the required information on the relevant business from external and public sources. One really needs to get access to the expertise and specialists that work within the company, and then to interview them. A meeting needs to be set up between the subject matter experts and the writer. The writer needs to understand the information, specifically, to understand the vision of the company, and the current objectives. It is the director and writer’s job to figure out the best way to convey the information into a workable concept that will have an impact on the audience. Judgement is one of the key skills, which the director requires in the creation of the concept. Another important and professional characteristic is finesse. Just like over acting is a problem, so too are exaggerated storylines and concepts, which are too intense. Playing it safe is usually a good idea, seeing as though the company’s reputation is on the line.
The structure for the various types of videos, whether a corporate video or a fictional narrative, is usually in three acts. In fictional narrative, the three acts are called; setup, confrontation, and resolution. The first act is used to establish the main characters, their relationships, and the world they live in. The second act, depicts the protagonists attempt to resolve the problem, only to find the situations getting worse. The third act features the resolution to the story. In corporate video, the script is also broken down into three parts: a beginning, middle, and end. Here is an example layout for the script. At the beginning, one can see an introduction to the difficulty, challenge, or problem that needs to be overcome. In the second part, one could show what’s complicated about the problem. And in the last part, a solution should be offered. In short, whether fiction narrative or corporate video, the story needs to have a recognizable structure similar to other works in similar categories.
4 Professional Video Production – Pre-Production
Lecture 4 – Professional Video Production – Pre-Production
As an independent director, you’re going to have to doa lot of pre-production planning. One of the responsibilities which you have, and which you don’t want to overlook, deals with scouting for good locations in which to film. When I say good, I am referring to several factors. First, as part of the script writing process, there is a vision that has been created for the production. The scouting phase is a continuation and elaboration of this vision, as it adds the missing visual layer to the story. You need to make sure to look for interesting and cinematic scenery and to find good visual angels, which will work to tell the story. On top of re-enforcing in your mind the flow of the media piece, it is a lot of fun to scout and look at the environment. Second, of key importance is to ensure that the location will work logistically. You will need to consider the power requirements of the shoot and whether the location can supply that power or whether you will need to bring batteries and generators. You will need to check out the audio considerations. Is the location in a place that is very busy and noisy, or is it a quiet location where a production could potentially disturb others? Further, an assessment of the overall lighting characteristics will need to happen. A lighting plan will need to be developed which will involve determining the kind of equipment that will need to be brought on the day of filming. Logistics includes many other things, such as whether there is ample parking for everyone or whether the location is rentable or accessible with a permit. Make sure to bring with you some paper to list down all of the observations, and to create checklists of the types of equipment that will be needed at the different locations.
Shot List & Storyboards
There are two very important documents that must be produced in order to ensure that the production will be filmed well. They are the shot list and the storyboard documents. First, the shot list, it is a document which lists all of the shots in the scene. For example, a typical scene might include a wide shot (WS), two medium shots (MSs), and two close-ups (CUs). The wide shot would show a view of the entire scene. Two medium shots, one per actor, would frame each actor individually, but the shots would be from matching angles. Similarly, the closeups would be like the medium shots, but closer in to the actors. In reality, it is more complicated than this to frame all of the actions that are part of the sequence of making a visual media production. Due to the complexity, the shot list helps, but confusion can arise on the scene if another document, the storyboard, is not produced. The storyboard is an even clearer way of expressing the sequence of events that will appear on camera. Without it, it can be difficult to communicate with the crew at time of filming. With it, it allows for a very fast and efficient communication with the crew.
Casting
As part of planning and preparing a production, the Producer must advertise the production to potential actors and actresses. Try to avoid asking friends or aquaintances to be the talent in a professional production. First, it is not likely they are trained to provide a good performance and will not likely fit for the production, and secondly, they will not be as serious as professional talent chosen through a professional process. Don’t worry; there are many places to look for serious and excellent talent. Good places to look for talent includes; local theatre groups, modelling agencies, acting agencies, media equipment societies, film and video societies, post-secondary drama departments and comedy clubs. After advertising the talent, and getting in touch, the producer will need to set up audition meetings so as to select the cast that will best fit the vision of the director. In the meeting, there are several things to look for, including; the performance ability, the ability to take direction, the appearance, and the personality attributes. These criteria canbe hard to judge on the day of the auditions, and as such, plan to record the auditions for later review.
Scheduling
Scheduling a production can be a little bit stressful because there is always the risk that you may not be able to organize all of the elements to come together on the different production days that are required. Things can go wrong, and shoot days may need to be rescheduled. The schedule though, it holds a production together. It is the main step in converting what you see on the paper script to the image on the camera. It allows the director to plan what resources and people will need to be where and when, and to communicate that information to the crew and cast so that everyone remains coordinated. Though you would think that a production needs to be scheduled according to the sequence of events in the storyline, this is not actually the case. Often, the order of the scenes are actually scheduled out of order, as it is often the case that locations are not available in the order they appear on the screen. Actors need to be familiar with the entire script, and must adapt to actinga story out of sequence.
Rehearsals & Blocking
When I shot independent films, I was lucky enough to have time for rehearsals and blocking. Rehearsals made all the difference, and the resultant quality of the media productions were high. In the few instances when I didn’t schedule rehearsals, the performances of the actors suffered, and also, flaws began to appear in the lighting and camera work. Rehearsals and blocking allow the actors to work together and to figure out how to best play the scene off of each other. Rehearsals do not just benefit the actors, but they also benefit the director and the cameraman. The director and cameraman can run through the scene and this helps them to figure out where to best place the camera in relation to the movement of the actors, and how to best move around the actors in the scene. Some dramatic scenes are very complicated and working out “this dance” that requires both the actors and cameraperson to hit certain marks, takes some practice. Otherwise, you may find yourself on film day communicating what needs to be done more than actually doing what needs to be done. When the day of filming arrives, you, the director will easily be able to direct all the complex elements that must work in concert to successfully film on a tight schedule, as you will have had by then a good vision practiced in your mind.
5 Professional Video Production – Introduction to Legalities
Lecture 5 – Professional Video Production – Introduction to Legalities
Introduction to the Legalities
The producer must consider the different legal implications of creating a media production. Unfortunately, this kind of knowledge can be hard to access, and lawyers may be too expensive for many smaller productions. As a result, many media producers work without the assistance of a lawyer. Even so, there are some basic steps that every producer must take in order to limit the potential of liability when doing a media production. Some of these things include getting consents, releases and permissions required in writing and signed by the appropriate persons.
Location Permit
A location permit is a form that grants the production permission to film on a private property. The producer must get the consent of the property owner and have it in writing. If someone were to object the right of the production team to be on that property on the day of filming, then the form could provide a quick proof that everything was done in a legitimate fashion and the necessary permissions were obtained. In addition, it protects the production from an owner who later makes claims that they had no right to be there and proceeds to demand compensation.
Actor Releases
Actor releases are also called talent or model releases. These forms are your way or proving that they have consented to be filmed in your media project. You see, sometimes people change their mind about a project after they have been filmed. If this were to happen, your project may not get done. The best practice is to have everyone sign these actor releases before being filmed.
Copyright
While filming scenes in different places, you may find that some of the things in the backround like certain statues, architecture, or pieces of art are copyrighted. Some of these things require that you obtain clearances, but it can be a bit hard to figure out which. Regardless, make sure you leave some time to investigate “backround objects” so as to ensure that you are not held liable down the road. If you find things that are copyrighted works, either clear them with an attorney or avoid them altogether.
6 Professional Video Production – Using A DSLR
Lecture 6 – Professional Video Production – Using a DSLR
Production is the phase of the video project where the actual filming takes place on location.
The Organization of a Production
Though most professional productions require a large team of diverse experts to work together, it is possible for a small team of experienced personnel to each put on multiple hats and accomplish what would normally take a far larger crew. In fact, there are very efficient teams out there who are able to produce an entire production with only two or three people.
The Director-Producer Position
An example of wearing two hats in the production would be the director-producer role. Many media organizations or groups create media by assigning the position of producer and the position of director to the same person. This person would essentially be responsible for project management and creative direction. In an even more extreme sense, sometimes the director-producer is also the photographer. However, going beyond wearing three hats would be counterproductive and most likely jeoparidize the quality of the production. At the very minimum this director-producer role, or the director-producer-photographer role would need at least one assistant, a production assistant. In this circumstance, production assistant (PA) would need to be more experienced than a traditional PA, as they would need to do lighting, electrical, audio recording and other grip work. If the production must be done very affordably and efficiently, three people would be a better number. However, at least two are usually necessary for any chance of professional success.
Using A DSLR
The DSLR camera is an excellent choice for video production projects. It is much better than the traditional videocamera for various reasons. First of all, the image sensor within the DSLR picture cameras is much larger than a traditional video camera, which allows for a much greater ability to record in various lighting conditions. In addition, whereas a traditional video camera uses a fixed zoom lens, the DSLR camera allows the user to change lenses as needed. Simply put, the all in one lens on a traditional video camera cannot perform all the various looks that can be achieved with separate, specially designed lenses. For example, if someone were to want an extreme telephoto, or extreme wide angle, or a fast lens that performs well in low light, the zoom lens on the video camera would not be able to do these things. Therefore, the DSLR picture/video camera is a more exact tool that will give you a higher quality and a greater control over the image acquisition process than would a video camera.
- Prime Lens – Prime lenses are lenses that have a single angle or a single perspective. They are typically smaller and lighter than zoom lenses. Also, they are sharper and faster. By fast, I mean that the prime is better for low light shooting. Whenever you see an amazing photograph in an art gallery or when you look at a movie, chances are it was done with a prime lens.
- Zoom Lens – Zoom lenses are lenses, which contain multiple focal lengths all within the same lenes. A zoom lens can have a range of focal lengths; say a lens could be an 18 mm to 70 mm. The benefit of such a lens is that it is able to shoot multiple perspectives, wheheras, to accomplish the same thing with a primes, you would need a few primes and then you would need to switch them out to accomplish different perspectives. So in short, a zoom lens is affordable in that one lens can do the job of many primes, but also, it is handy and easy to use. The disadvantage is that the performance of the zoom lens is not as high. The zoom lens has more glass elements within the lens and as a result producer a darker image than would a prime.
- Tripod – One of the key tools professionals useto make their camera work look cinematic, is thetripod. The tripod is stabilizes the camera work and improves image quality. It really is, essential. Tripods though, they are not created equal. Some of them are fluid head and some are not. The problem with the non-fluid head is that they are designed to keep a camera in place. Try to look for one with a fluid head, that also has a drag knob, which allows you to set the tension so that you can control the tension, or the speed of the pan and tilt. In addition, look for a heavier tripod as it will anchor the camera bette
- Shots that are filmed must be filmed with the camera positioned level to the ground. A good tripod will have a little green air bubble indicator. Ensure the air bubble is in the center of the circle.
7 Professional Video Production – Camera Work Controls
Lecture 7 – Professional Video Production – Camera Work Controls
CAMERA WORK – Controls (Part 1)
Manual Controls
Anyone who wishes to improve the quality of the imagery they shoot through a DSLR needs to consider that they must operate the camera in a manual matter, rather than an automatic manner. That is actually one of the most important aspects for a professional, the control(essential) that shooting in manual mode provides. If a camera were to not have these controls, it would be useless. Examples of essential controls, which a camera needs to have, includes; focus, aperture, shutters speed and white balance.
Exposure
When talking about digital cameras, the term exposure refers to the amount of light that is let in onto the image sensor. If not enough light is let in, then the resultant captured image will be underexposed. If too much light is let in, then the image will be overexposed. Overexposure is a big problem, because if you film with too much light or if it is too bright out, and you don’t reduce the intensity with the aperture, then the image will clip. If you then try later to fix the problem in post-production, you will find that you cannot bring out any information from clipped areas of the frame. When it comes to underexposure, the situation is not ideal, but there are fixes that can be made after the fact. For example, if a scene is recorded too dark, there is still some detail in the recording that can be brought up with post-production tools. The only downside is that, as detail is brought up into view, there will also be visible grain that will show up. For these reason, many filmmakers err on the side of caution when they film, preferring to underexpose an image rather than overexpose it.
This is an image of the LCD display on my camera. I’ve turned on the Zebra Stripes, which highlight the areas of overexposure within the frame. In this image, almost the entire frame is overexposed.
There are three essential exposure related settings in your camera: aperture, shutter speed and ISO. These three settings are referred to as the exposure triangle.
Aperture
At the back of the lens, you will find the iris mechanism, which opens and closes to allow light into the camera. The iris can be opened up to allow light in, or closed down to reduce the light that enters the camera. The opening is referred to as the aperture. There are two ways to control the aperature, manually or automatically. It may be tempting to let the camera do the work and set your exposure for you, but automatic aperture will not give the best results. For example, imagine that the camera is set on automatic aperature, and someone crosses in front of a light as they run across the screen. The motion in the scene and changing light will trigger the camera into changing the aperture. On the other hand, if you were to lock down an exposure level with manual aperture control, the image would not get darker or brighter even if motion and light changes happen in the scene.
The opening at the back of the lens has a variable size. If it is more open, then the iris does not stop a lot of light, and the f-stop value is smaller. If it is more closed, then the iris stops more light, and the f-stop value is larger. On the picture, we can see that the iris on the right is closed down more than the iris in the middle or on the right, so therefore, it stops more light.
A lens can be “fast” or “slow”. If the minimum f-stop is low, then that lens is a fast lens, and it will allow in more light. If the minimum f-stop is high, then the lens is a slow lens, and will let in less light.
F-Stop
The following three images were shot with three different f-stop settings. The bottom right image is the darkest, as it was shot with f/16. In the bottom right image, the plants or the darks are crushed. The bottom left image is the correct exposure, and it was shot with f/7. At the correct exposure, we can see detail in the plants or the shadows, and also, we see detail on the surface of the building or the highlights. The top image is the brightest, and this was shot with f/4. In this image the highlights, or white areas of the building, are overexposed.
Aperture and Sharpness
Lenses are not uniformly sharp across the entire aperture range. The general rule is: lenses are usually sharpest about two to three apertures smaller than the maximum aperture of the lens. Stopping down the lens may mean that you have to increase the light level of the scene. If this is a possibility, do so as it is worthwhile to shoot with a lens operating at its best aperture. To get an understanding of your lens, it is best to do a few tests with the lens and discover its performance qualities. Hopefully, you will find your lenses sweet spot.
Shutter and the Gain/ISO
I’ve shot short form and long form independent films, and most of the time, my photographer, or I didn’t find it necessary to alter the shutter speed or modify the ISO/Gain. These settings, I think, are “last resort settings”. You should be able to achieve proper exposure under most circumstances with a good set of lighting equipment and high performance low light capable prime lenses. If you absolutely need to increase your ISO/Gain, be aware that this will introduce some noise into the image. Some modern cameras are quite effective and it will be possible to raise the ISO/Gain a little bit without degrading the perceptible image quality. As for shutter speed, it’s best to set it according to the frame rate. If you are shooting at 24 frames per second, and hopefully you are, then double the frame rate to 48, and set the shutter to about 1/48th of a second. In short, it is best to disable the gain, leave the shutter set to the predetermined value based on frame rate, and simply adjust lighting and aperture to properly expose your scene.
8 Professional Video Production – Camera Work Controls
Lecture 8 – Professional Video Production – Camera Work Controls
CAMERA WORK – Controls (Part 2)
The “Fast” Lens – Most cameras that you buy in the store come with a standard, low cost, zoom lens, also called a kit lens. This lens works for everyday shooting during daylight, but the performance suffers at nighttime when low light shooting is required. In addition, it limits the creative options; for example, one cannot do extreme wide angle or long telephoto shots. At a bare minimum requirement, you should consider getting a fast 50 mm prime, if you don’t already have one. This fast lens could be an f/1.4 or f/2, as compared to a zoom, which might be a f/5.6. The f/5.6 is many many times darker than an f/1.4 or f/2. The reason for the 50 mm, is that it is closest approximation to the view of the human eye. Shooting through a 50 mm appears to people, as they would view the environment.
Using the Histogram To Estimate Exposure
The histogram can be used to gauge exposure. It can help you tweak your aperture in the right direction so as to record the proper exposure level. On the histogram, you should see a range of tones from left to right. Hopefully, you are exposing just right and you see a nice spread of tones throughout the entire range. However, if most of the tones are all in the dark area (the left), you want to check that you are not crushing the blacks. You can do this by ensuring that most of the tones are not grouped together on the left side, and then that they do not hit the left border and suddenly drop off straight down. If most the tones are all in the light area (the right), then you want to check that you are not clipping the highlights (or overexposing the highlights). You can do this by ensuring that most of the tones are not grouped together on the right side, and that they do not hit the right border and suddenly drop straight down. This would imply part of the tonal range is missing and has been clipped. With digital capture, you never want to reduce the detail or block out the detail from the recording in such a harsh and drastic manner. The range should end before gradually as it reaches the sides. Make sure you adjust the aperture to get the look that you want, but at the same time, check out the histogram as it changes to confirm that you are at an acceptable level.
TOP LEFT IMAGE – The tones on the right side are overexposed. The highlights can be seen to be too strong, and the shadows are missing. The tones are grouped towards the right, and are clipped on the right side.
BOTTOM LEFT IMAGE -The histogram is underexposed on the right side, and as for the left side, the tones are crushed.
BOTTOM RIGHT IMAGE – This is an ok exposure. This histogram represents a nice range of tones. Ideally you want the tones to be mostly even from left to right. However, this particular image has a “bias” towards the darker tones.
Exposure and Depth of Field
Many people, who’ve never used a DSLR before, wonder how that “focused subject and soft backround” is achieved. A sharp medium-close up with a soft background can look absolutely stunning. It’s one of those indicators to the public that a professional must have filmed the project. Control over depth of field, is what allows one to blur out the backround while keeping the subject in focus. Well the secret to the control of depth of field lies in the knowledge on how exposure is related to depth of field. I will go over this subject in more detail later, but for now, I outline the settings that will help you achieve control over depth of field, or more specifically, a shallow depth of field.
Low Light
If the scene is dark, you will use a low f-stop to open up the lens, which will produce a shallow depth of field.
ND Filters
If the scene is bright, using a low f-stop is not possible, as it will overexpose the image. To be able to use a low f-stop, you will need an ND filter. The ND filter will block out some light from reaching the lens, allowing you to use a low f-stop, which will then produce a shallow depth of field.
Long Lens
Long lenses generally have a bit higher f-stop value than normal view or wide-angle lenses. Also, they compress distance. The view one gets from looking through a long lens is often one that separates the subject from the backround.
Fast Shutter Speed
The faster the shutter speed, the less time available to expose an image. The faster shutter will help to produce shallow depth of field.
Decrease the gain/ISO
Another option is to decrease the sensitivity of the camera, or to decrease the gain/ISO.
This is an image that demonstrates selective focus and blur effect, of shallow depth of field.
There is a relationship between the aperature settingand the depth of field. If the lens is stopped down to a minimum aperature of f/16, then this setting will block most of the light from entering the camera. As a consequence, it will take a strong ambient light level in the scene to provide an adequate exposure. As for the depth of field, it will be deep, and pretty much; a lot of the scene will be in focus. If the lens aperature is set wide-open, say to an f/2, then the light will have no problem to enter the camera. As a consequence, it will not take a strong light level to properly expose the scene. As for the depth of field, in this instance, it will be shallow, and it will be possible to selectively focus within the scene.
Remember, if there is not enough light, open up the aperture or add more lighting. If there is too much light, then avoid overexposure by either adding a neutral density filter or stopping down the lens. As you can see, you have two choices for either way you go, and the choice you make will affect your depth of field.
White Balance
Digital cameras will not record an image the same way that the human eye perceives the image. The digital camera records both the objects in the scene and the lighting conditions present. By comparison, the human eye doesn’t perceive the lighting conditions, but the eye adjusts to the lighting conditions to see the actual colour. For example: If you stand near an incansdescent light bulb with a white card, the white card will appear white to you despite the colour cast that the light bulb may be emitting onto the white card. However, the camera will actually record the colour cast on the white card, it will record the lighting condition present. Therefore, the camera must be tweaked, to record only what the person would see if they were in that situation, and not to record the lighting conditions.
White balance is the method through which the camera can adjust itself or be adjusted to produce an image that is realistic and free from colour casts. As a result the whites will appear as white. DSLR cameras have the option to white balance the shot either through an automatic method or through manual control. Though you can use the automatic white balance feature, it is much better to take control and manually white balance. This will ensure that you record in a controlled and consistent way, and it will give the best results.
The first image has a reddish/orange colour cast, and people can immediately pick up on this and recognize the colour problem. They most likely assume it was recorded wrong, or that the editor was an amateur and intentionally produced it in post-production. The truth is, the white balance was not set up correctly in the shot, and and the image was recorded with a colour cast. This situation is fixable in post-production, and after a balance adjustment in the editing program, we can see white as white again, and end up with the image on the right.
9 Professional Video Production – Camera Work Composition
Lecture 9 – Professional Video Production – Camera Work Composition
CAMERA WORK – COMPOSITION
Framing Shots
The common types of shots used in film and video projets are; wide shot (WS), medium shot (MS), medium close-up (MCU), close-up (CU), extreme close-up (ECU), and over the shoulder shot (OTS).The difference between the shot is simply a difference in which portion of the image the shot is focused on.
WIDE SHOT (WS)
The wide shot shows the entire actor or group of actors, from top to bottom, using a lens roughly equivalent to 30mm. The entire scene is visible, and this can help set up a scene at the onset.
MEDIUM SHOT (MS)
The medium shot shows the upper body and head of the actor, using a lens roughly equivalent to 50 mm focal length. Though one can see less of the scene, a small portion of the background is still visible.
MEDIUM CLOSE-UP (MCU)
The medium closeup can have a striking effect on the audience. Using a lens roughly equivalent to 75 mm focal length, one can slightly throw the background out of focus, while focusing on the detail of the actors, usually the face and upper chest.
CLOSE-UP (CU)
The close-up shot is when you film the upper shoulders and the face of the actor, or simply the face and neck, and this will highlight an emotional and dramatic scene. A common focal length is 100 mm.
EXTREME CLOSE-UP (ECU)
The extreme close-up is closer than a close-up. It will just feature the face. The editor may struggle to figure out when to best use such a close-up, but as with the regular close-up, it will add to the dramatic effect.
Over The Shoulder (OTS)
Over the Shoulder shots are frequently done in interviews and in the movies. They help to maintain the relative position of the actor’s in the viewer’s mind, and to keep the feeling that the actors are talking to one another, rather than to the viewer.
Standard Coverage
When you record a scene, you will have to get a few standard shots, before you get creative with more elaborate shots. The standard shots, also referred to as standard coverage, are your way of ensuring you have at the very lieast a minimum editable sequencethat will work in post. This is insurance that you can finish your video project. The standard coverage includes shooting the same action from different perspectives. You first start off with a wide master shot, that includes all elements in the scene. Afterwards, you move in closer to the scene, by filming a medium of the actors, and then you follow up with close-ups of the actors. Having multiple perspectives or angles of the same action, will allow the editor the freedom to edit a basic but professional looking scene.
Rule Of Thirds
One of the most interesting and most useful rules in cinematography, is the “rule of thirds”. It can take only a few minutes to explain to a beginner, and once they adopt this rule as part of their practice, the result and improvement in their work can be dramatic. Many beginners will film an object by placing it at the center of the screen. This can looks static and boring. The rule of thirds is a way to break down different areas of the frame into nine zones, by dividing vertical and horizontal space into thirds. First, one needs to break the frame by dividing it vertically into three areas. Second, the frame can also be divided horizontally into three areas. There will be four important points of intersection. A subject, object, or element that is placed along the lines or along these points of intersection, can lead to a scene that is visually more cinematic.
180° Rule
When filming actors engage in a scene, there are many considerations that filmmakers must consider. One of these considerations Is the 180 degree rule. The 180-degree rule helps filmmakers plan where to place the camera. The rule requires that an imaginary line is drawn through the scene. All shots of the actors are then to take place from one side of this imaginary line. Any attempt to cross this line with the camera can lead to several problems. For one, it could be very jarring for the audience to experience the image shifts, and the audience can lose their orientation within the scene. Further, the eye lines may not cut together properly anymore. The filmmaker should strive to ensure that the camera does not leave the 180-degree space. Maintaining screen direction is also important for the editing task. Actors must always appear to make moves in the right directions. Otherwise, the editor will have a tough time to put together the scene in a continuous manner.
10 Professional Video Production – Lighting Equipment
Lecture 10 – Professional Video Production – Lighting Equipment
Lighting Equipment
As modern camcorders and digital photo cameras advance, they are able to produce visuals of ever-increasing quality. Sometimes, the visuals are so good, that it can be tempting to not bother with the set up of additional lighting. However, lighting shouldn’t be underestimated. Lightingserves several important functions. For example, without lighting, the scene may not have adequate ambient light level to properly expose the scene, and as a result the images may be dark, grainy, low quality and may not meet minimum technical standards. Second, if there is enough of an ambient light level, the pre-existing light may not convey the mood that is necessary and appropriate to the scene. Lighting is used to create the director’s vision by creating mood and atmosphere.
- Led Lights LED Lights are an incredible lighting technology. They offer several interesting features. First, and most important, they consume very little power. A led light that puts out about 500 watts of light can do so with as little as 40 watts of actual power. In filmmaking, there are many situations where access to power is limited, and as such, these lights provide a key advantage. For the field, battery packs, rather than generators, are often sufficient to power such lights. Being able to use batteries, rather than a generator, can mean the difference between a successful audio recording and a ruined track. In addition, many regular lights make actors uncomfortable due to the excessive amounts of heat, which they produce. The led lights run cool, and the actors will perform better under cool running led lights.
- LED light panels can put out soft light.
- Lightboxes – Lightboxes are simply large diffusion boxes that are placed on thephotographic lights. The lightboxes have black fabric on the sides, and a white diffusion fabric on the front. Their purpose is to soften the light.
Work Lights
When I initially started shooting video, I worked with friends and school colleagues towards the filming of experimental music videos, action sequences, and commercials. At the time, we weren’t serious enough to go out and invest our own capital in professional lights. It makes little sense to invest in heavy lighting equipment from the onset, when the majority of a person’s first endeavours in media production are not going to make any money. One popular solution is to go to the local hardware store and look for alternative options, or even build alternative options using do it yourself instructions from the internet. One of the most useful tools available to a newbie media producer, are the work lights available at the hardware store. These lights are very cheap, and offer a lot of wattage. Though they do have the problem that they get too hot, that the light has a warm colour cast, and that the light is very sharp, there are workarounds. For example, one could bounce the light off the wall or off a bounce card, to lessen the intensity and soften the light. Another option is to diffuse the light with some diffusion material. Further, the warm colour castcan be fixed in post-production, however the tonal range may not be as level and balanced as one would get with a professional light. Regardless, these types of lights will work for building a portfolio of work, and it may not be required to get professional lights until one does work for a client.
11 Professional Video Production – Lighting A Professional Video
Lecture 11 – Professional Video Production – Lighting A Professional Video
Lighting A Professional Video
Three-Point Lighting
Lighting a video shoot takes time, and will slow down the production speed. However, the amount of time it takes to light the scene, really depends on your lighting education and previous experience lighting other sets. If you haven’t lit many sets and haven’t had training by someone from the film industry, then it can take a long time to light a scene well. This is because lighting a set by guesswork and trial and error can grind the production to a crawl. In this case, actors are likely to complain and wear out. In the past, I went right into the filming of independent short form and long form films before I had actually read the lighting design textbooks. Don’t make this mistake! Sure, it is possible to make something “look good”, without a foundation technique, but consistency from scene to scene shows professionalism. At the minimum, everybody considering a video project production should know the basic, foundation technique for lighting a person speaking on camera. This technique is called “three point lighting”.
Under three point lighting, you point three different lights towards the subject, but the lights are positioned around the subject and are angled at the subject from different angles. The three lights are the “key light”, the “fill light”, and the “backlight”. A scene could easily require more lights than this, but the process begins with three-point lighting. The lighting process is then elaborated, expanded, and tweaked towards a more advanced lighting strategy that is often required on professional sets.
The key light is the main light in the scene. It is the most important light. It will give form to the object being filmed. It will light the object or subject and the areas around. It will create shadows. The shadows it creates across the subject will make the subject appear to be more of a three-dimensional figure. You need to think where the shadows will fall in the scene. Another important factor, think about where the audience expects the light to come from in the scene, and that is a possible location. Once you’ve established the location for the light, you can go on to light the rest of the scene. Usually, you want to place the camera about a 45-degree angle from the key light
The fill light is on the other side, or opposite, the key light. So for example if you are filming a subject straight ahead, and the key is positioned on your left, then the fill would be positioned on your right. The fill is a soft light, and should be diffused. You can even bounce the light off of a white board. The intensity of the fill light, or the softness chosen, all depends on how much shadow you want to remove from the scene. The point of the fill, after all, is to reduce the intensity of the shadow that is caused by the key light. Though it’s good to remove some of the shadow, its important not to remove it all. Usually, a good setting of the fill, is to have it at half to about three fourth’s intensity of the Key light. The ratio between the fill and the key, or the different ratio’s between the different lights in the scene, will alter the mood and feel of the scene.
The backlight is the light behind the subject, and up and above the subject, pointing downwards towards their back. It creates an edge of light along the hairline and around the clothing, which not only helps to accentuate and provide detail to the edges, but also helps prevent the edges from blending into the background. More important than the definition it provides, is the sense of separation that results between the subject and the background. This feeling of separation, give the viewer a feeling of dimensionality or of depth in the scene. The backlight should be about the intensity of the key light, or even brighter.
The key light, fill light, backlight will create the proper shadows, fill, and edge lighting.
When you go on a shoot, whether it’s a promotional video, an independent film, or a documentary, what will immediately be obvious to you is how the lighting is set up. Most of the time, the lighting setups involved, can provide you with a sense about the level of knowledge and capability of the filmmakers involved. What if, for example, you notice they are not doing three-point lighting? The fact is, the lighting you see may be very different than the three-point lighting I have described. Remember, the lighting environment required may be such that, it may not require three point lighting, after all, three point lighting is just a starting point. One thing, which I want to mention, is: If you are on set as a production assistant, and you see that there are deficiencies in the lighting set-up, remember your level in the hierarchy. As a production assistant, it may not be possible to implement much change. Simply put, some video producers light based on their subjective feel of the image, and they don’t use precise measurement tools such as light meters. Light meters are often used by film professionals such as lighting designers, cinematographers, gaffers and electricians. Even so, the video producers you see might be very good with lights, they might be turning out great shots, or maybe they are winging it and are creating poor imagery. Sometimes it’s hard to tell! Either way, approaching the director and cinematographer and telling them they could light differently may not work to your advantage. In the production assistant role, leaving a good impression is just as important, if not more so, than fixing the mistake of all the people up above in the hierarchy.
Lighting for a Darker Mood
A darker mood can be achieved by increasing the contrast in the scene. Instead of using three-point lighting, try using two points. Use a key light, in combination with a backlight. This will create a strong shadow across the actor’s face. If this look is too dark, you can leave the fill light in the scene, but tweak down the brightness of the fill until it reaches just the right contrast ratio for the mood you are trying to create.
Lighting for a Soft Mood
To create a soft mood, remove the key light from the three point lighting configuration. The fill and backlight, will create a moody look, but the image will feel soft.
Mixed Lighting
Suppose you are filming a scene in a room, and that room has a big window. Since it’s very common for rooms to have windows, you’ll need to know the issue is. That issue, is mixed lighting. Daylight, which has a colour temperature of 5500*K, comes in through the window. But the artificial lights you are using to light the scene, may have a colour temperature of 3200*K. The different colour temperatures form different areas of light in different parts of the room. If the camera is balanced for daylight, the scene outside the window will look the correct colour, but further into the room and near your artificial lights, the scene will be more reddish or orange than in reality.
If you are thinking that the solution to this problem is to simply white balance the scene to the colour temperature of your artificial lights (3200*K), well then what will happen is that your scene will look like the right colour, but conversely, the scene outside will be very blue.
The solution is that the light needs to be balanced so as to make everything approximately one colour. You can add a large orange gel on the window, which will filter the sunlight entering the room and make the light warmer so that it matches the colour temperature of the artificial lights used inside. Then you would white balance for the artificial lights. Or, the simpler solution is to attach smaller blue gels on the artificial lights, and then white balance for daylight.
12 Professional Video Production – Lighting Tips
Lecture 12 – Professional Video Production – Lighting Tips
Lighting Tips
Light Quality
As a media producer proceeds through various video projects, lights must be set up on the different sets, in different positions and configurations. The variety of lighting tasks and configurations and set deisgns can be a bit confusing to someone who has not lit things before, and as such, sometimes errors can show up on the recording. If a media producer does get the lighting configuration right, does this mean that the subtle aspects to the light are also correct? This is the problem, that sometimes we overlook the nuances, simply because there are too many details to address and we may not even be aware of all the details that need to be addressed. One of the nuances, which can be overlooked, has to do with the quality of the light. Unless someone teaches you that there is such a thing as quality of light, you would probably not think about that issue on your own. On set, light is often described as hard or soft. This is a subjective assessment, which requires that one observe the light. So what is hard light and what is soft light?
Hard Light Quality
If a light source is small, and if there is no diffusion between the light and the actor, and it is intense like a single spotlight beam, then the light will have more contrast and will be hard.
Soft Light Quality
If a light source is of a larger area, and there is diffusion between the light and the actor, and it is bounced, then the light will have lower contrast and will be considered soft.
Using Reflectors
A long time ago, when I began to learn video production, by working with colleagues on different types of videos, we learned the camera quickly enough, but the lighting took longer to master. One of the very first things we learned was thatwe needed some sort of lighting solution to expose images properly. This was especially true with the video cameras at the time that had small image sensors, and a very poor sensitivity to low light. Work lights were the saviours. But, no matter how cool the images looked when shot indoors, in a controlled environment, the outdoors sometimes presented challenges. Outdoor shooting was unpredictable, as the sun and cloud combinations seemed to control whether or not we would get good footage. And at nighttime, the grain on the early camcorders was disastruous. During daylight, we learned that our small lights, even if powered by a generator, many times could not compete with the sun. This may not be immediately obvious to a newbie, but it takes a lot of light to be able to bring the level up enough to work during bright daylight. Most studio light kits are just not that powerful. A much easier solution is to just bring a couple of inexpensive and very lightweight foil reflectors and bounce cards. By bouncing light from the sun with a reflector or bounce card, or blocking light from the sun, or even diffusing the light, it becomes possible to light a scene professionally, but without using lights! This is very advantageous, as using a generator outside to power lights will most likely destroy your audio soundtrack, disturb others in nearby vicinity, and make it difficult to produce as it involves many cables and lugging around a hefty generator and light package. Reflectors can produce light of various qualities. For example, they have different surfaces, some with gold, silver, or white covers. The metallic gold or silver will reflect a harsher more focused light, whereas a matte white surface will reflect a more soft and diffuse light.
On a sunny day, all you need to achieve three-point lighting is a simple white card and a reflector.
During golden hour, you can place your subject right between you and the camera. The sun will serve as a very strong backlight. To complete the three point lighting set up, put a white bounce card on one side to act as the fill, and a shiny reflector on the other side to act as a key.
Bouncing
One commonly overlooked practice by those new to lighting, has to do with bouncing light. Sometimes so much focus goes into just lighting the scene that too much light may be thrown on the subject. The intensity needs to be controlled, and the best way to do this is to dim the light, or take the light further back from the subject, or simply by bouncing the light with a white card. The last solution can also look very visually pleasing, softer, more diffuse, more flattering, and less artificial.
Adding Depth
One of the tricks I used to use when building a set or staging a scene for a film shoot, was to enhance the three dimensional aspect of the scene. I would place a tablein the scene, some plants, a cabinet drawer, all things that convert an otherwise bland room, into a room where it is obvious how deep it is by having objects with which to reference space and dimension. So why did I do this? Well, have you ever tried filming a wall, or a person in front of a wall? This kind of imagery can be very boring. The reason behind this is, through our eyes, we interpret the world as a dimensional structure that has width, height, and depth. But the television screen just has width and height. It is flat. So the person designing the set, and the cinematographer picking the angle, and the gaffer setting up the lights must all think about how to accentuate the scene for depth? For example, the scene could be broken into a foreground, middle ground, and background area. Different layers of the scene could have a different colour, so as to accentuate the layers and give the impression of depth. Depth looks good on camera, is comfortable to watch, and also showcases your abilities as a video producer.
Shading
Shading, or shooting scenes with some shadows in them, can make the sene look interesting. Often times, inexperienced lighting designers may be afraid of shadows, as they may fear that a misplaced light could cast an unsightly shadow of the subject or another object onto the backround. Usually, this would not be good, as it would reveal that there is a misplaced production light. The problem is, that sometimes, inexperienced lighting designers try to remove all shadows from the scene. This can make the scene look lifeless, bland, uniniteresting, and flat. The reason I say flat, is that when you have a shadow or a darker tone, the human eye actualy interprets that as being further than say an area, which is bright. We determine depth information from shading, which gives the scene a dimensional real world feel. So in short, yes, eliminate unsightly shadows that give away that you are lighting a scene, but don’t be afraid to create shadows in different areas so as to make an interesting textures throughout the scene.
Light Gels
Gels are very useful, especially indoors. Gels allow you to colour your scene. With colour, you can enhance a dramatic moment, or make something look like a work of art. Gels and lighting helps avoid the risk of ending up with a dull, flat, lifeless image. Also, without control over colour, the work will not look cinematic. Bring gels of different colours along with you, as part of your equipment kit.
Diffusion
Diffusion is usually some sort of fabric that is placed between the subject and the light source. It helps to soften the sharp edge that the digital look often produces. You can cover the lights with diffusion fabric, by clipping on a diffusion paper onto the barn doors of the light.
Power Supply
This course is not an electrical course, but I do want to mention an important electrical concept. If you run too many lights from the same circuit in a room, you can blow the fuse. And if, by any chance, you don’t have access to the fuse, your shoot is over. It’s always best, to use a few extension cords so as to run some of the lights off other circuits in other rooms. The goal is to spread your power draw to different rooms, to draw current from different circuits, because this way, each circuit shares only a portion of the total power requirement.
13 Professional Video Production – Audio Devices
Lecture 13 – Professional Video Production – Audio Devices
Audio Devices
Shotgun Microphones
Shotgun microphones are one of the most useful microphones you can get. If all you can afford is one microphone, then get a shotgun microphone. Typically, you wil either have it attached to the camera or to a boom pole. A boom pole is a better position, because it is closer to the actors, and also, instead of being pointed at the actors, and consequently, anything behind the actors, it is up above the actors pointing only at the actors. When someone holds the boom pole above the actors, the microphone captures the dialogue of the actors, but also the associated environmental sounds such as footsteps. In addition, since the microphone does not pick up sounds on the side, but has a narrow angle of pickup only in the direction it is pointed, then this helps in reducing background noise from getting into the recording. There are two disadvantages that you will need to deal with. One, the shotgun microphone on a boom pole is susceptible to handling noise. I’ve had a shoot ruined by operators, which moved their hands around the pole a little bit too much. You not only need to make sure you communicate how sensitive the microphone is to handling noise to your operator, but you need to add on a special shock mount. Two, anytime you use a microphone outside, it is susceptible to wind noise. The wind pressure can easily move a microphone’s diaphragm, so make sure you cover the microphone with some sort of foam such as a windscreen.
A shotgun microphone! In addition to the shotgun microphone, you will need a boom kit. The boom kit consists of a boom pole, microphone holder, and a windscreen. An audio assistant is needed on set to operate the boom. The microphone will need to be checked that it is recording and levels will need to be set at the appropriate level. Throughout the shoot, the boom operator will monitor the audio to ensure a quality recording.
Lavaliere Microphone
The lavalier microphone, sometimes referred to as a lav, is another great type of microphone that you should consider for your kit. I can tell you, that I’ve purchased some inexpensive lavs before, and the results were poor. Try to stay away from cheap lavs and you will have a microphone that sounds rich, personal and high quality. The reason it sounds like this has to do with how close it is positioned to the subject’s mouth. Usually, it is pinned on the blouse or shirt or tie, and at this distance, which is less than about 12 inches, the microphone is very effective at picking up a rich vocal track. One thing to note is that this microphone is made for picking up just the sound of the person wearing it, so you will pretty much need a lav for every person appearing on camera.
If you’re shooting in the studio, you can easily use a wired lavalier microphone. However, when you are on a set with multiple people in the field, then a wireless lavalier kit will be handier. This way, people do not trip over each other’s wires. The wireless lavalier is a system where the actor has a normal lav microphone attached to a transmitter on their belts. The transmitter transmits the wireless signal to a small receiver attached to the recording device.
External Recording Device
DSLR cameras have a very poor microphone built into the camera. They were originally designed to take only photos, then upgraded to handle video, but at no point was there an upgrade of the audio system to handle any type of professional audio. As a result, the audio offered by DSLR cameras is absolutely horrendous. For this reason, people that use the DSLR’s for video projects, use a “double system sound”. Double system simply means recording a scene with two devices. First, the video and audio are recorded with the DSLR camcorder. In the video file, will be the reference audio track, the one you will use to sync the sound with, but not use in the final produced video. While recording with the DSLR camera, the second recording device will be theexternal audio recording device, for example, the Zoom H4n. The Zoom H4n will have it’s own higher quality built in microphone, which can be used, or it will have XLR inputs, which will allow you to use a professional quality XLR microphone. The Zoom H4n will have an 1/8th inch jack, which will allow you to attach a special wire from the H4n to the DSLR’s microphone input. This will make sure that the same microphone that is used to record the professional sounding track onto the H4n will be also be used to record the reference audio track to the DSLR. Now you may wonder, if the Zoom H4n can record an audio track and send it directly into the DSLR, why do you then need to record onto the H4N and then copy the file to the computer to do the sync process in post. This is a good question. The reason for doing all this extra work is that you cannot rely on the DSLR mic input to capture the microphone signal effectively. You must avoid using the audio that comes into the DSLR for the recording, relying on it solely for the syncing process. The file on the H4n recorder is the file you want in the actual post-produced edit. For one or two actors, the H4n will be sufficient, but you may need to upgrade to other devices for more actors.
I’m just going to mention briefly the popular Zoom H4n external recorder that I have used for production, and that I recommend for use in a dual system sound setup with a DSLR. The DSLR cameras capture sound at 16-bit depth. Most external recorders nowadays, like the Zoom H4n offer a numer of frequency and bith depth options, usually ranging from 16 bit 44 kHz all the way up to 96 kHz 24-bit. Though you may be tempted to use the 96 kHz option, you might want to consider the fact that most video projects are done at 48 kHz 24 bit recording option, as it’s the industry standard. In addition, the external recorders are great as you can record WAV sound, which is higher quality than a compressed audio scheme. As for the sound inputs to the recorder, it will allow you to record up to four tracks at the same time. It has two external 1/4” or XLR inputs, as well as two decent quality onboard microphones. I find the onboard microphones very precise, clear and generally like the sound. Also, I tend to hook in an XLR microphone when the action is further away from the camera, or when there is movement in the scene, as then I can benefit from having a boom operator, and the fact that XLR cables transmit high quality sound over a longer distance. Remember, chose a microphone type, and try to stick with that, instead of swapping between microhone types, since different microphones will sound different from one another.
14 Professional Video Production – Audio Monitoring
Lecture 14 – Professional Video Production – Audio Monitoring
Audio Monitoring
So much time is spent on setting up on staging the scene, selecting the appropriate camera angle, lighting the scene, and providing instructions for those on set (crew and cast), that sometimes not enough time is allocated to checking and double checking the audio recording setup. While preparing an interview, one should ask the host and the interviewee to have a conversation, or to read from a script, at the same level that they would normally talk at during the actual recording. They will need to do this for a few minutes so as to give the necessary time to the audio recording expert to check all of the connections, check that the computer or recording device is doing the recording, and monitor and adjust the levels as necessary.
Setting Audio Levels, Avoiding Clipped Audio
One of the tricky things with recording audio is setting the appropriate recording level. It may take a few trial runs to get the most optimum recording level set up for your recording device. The problem lies in the fact that it is all to easy to either send the recording device too much level or not enough level. In the instance that you set the recording level too high, well this will produce a nasty digital distortion. The recording devices have a 0 dB limit, and if the level exceeds this amount, clipping will occur, resulting in a recording with digital distortion. However, if the level is set too low, then the recording will be quiet, and it will be required in post to amplify or boost the signal. Boosting a weak signal will result in a signal with a lot of noise, which will frustrate the audience. As a genera rule, you should set your recording level somewhere between -20 dbFs to -10 dbFs for a good sound. The maximum is about -6 dBFS, but I would keep it about -10 dBFs at most. This will allow you to absorb any louder peaks, while being loud enough to maximize the recording detail. These are the guidelines, but you still need to listen to the recording to figure out the recording device’s sweet spot.
Headphones
When directing and shooting a video on set, someone must be assigned to use the headphones. Preferrably this person is not the photographer, as it can be overwhelming to take responsibility over the image and audio at the same time. If it has to be the director who listens to the headphones to offload some of the work from the photographer, well then that is a better solution. Hopefully though, there will be a dedicated assistant who will manage the audio recording aspect of the production. Headphones are important because it is not possible to determine whether the audio is getting recorded properly by simply looking at the VU Meter. To be able to tell if the recording is clear, or if it has distortions, or if it is unbalanced between the different elements, these things all require an active listener. The sound must be listened, and the listener must decide if it passes the different quality metrics.
Recording Clear Sound In A Noisy Place
When you do enough audio editing for video productions, you begin to realize that it is very difficult to remove unwanted sounds, such as noise or environmental sounds, from a recorded track. On the other hand, if it is required to add sounds to a track, and mix them in, well that is pretty easy. The problem video productions often face, deals with the capture of sound that is free from nearby noise. Say you want to record an outdoor scene at a nice cafeteria. Say the cafeteria has a dozen patrons, and perhaps you are only trying to record the conversation of two actors. Instructing everyone to perform the scene, as it would happen in real life, is not useful for the purpose of sound recording. Under the condition that everyone talks at their regular levels, the background conversations of the patrons would interfere with the clean audio recording of the conversation of the two main actors. In this instance, you want to separate the background talk from the foreground talk, and this can be done by instructing the café patrons to pantomime talk, or fake talk, while allowing you to focus the audio capture of the main actors toa foreground track. Then it would be the turn of the background café patrons to talk, and you will have to record them on a background track. In the editing suite, you would mix these two tracks and set the balance accordingly.
15 Professional Video Production – Post-Production
Lecture 15 – Professional Video Production – Post-Production
Post-production
Simply put, post-production is the phase after production. There are various stages that one must go through to professionally post produce a video project.
- Import Video Clips
- Backup Video Clips
- Edit Video Clips Into A Sequence
- Add Graphics, Effects, Titles
- Perform Colour Corrections
- Apply Film Looks
- Add Sound Effects
- Add Music
- Export Master File
- Backup Master File
- Create Web Copies
- Distribute Web Copies
Obviously, even though it may be easy to assume that post production merely involves “editing”, there are obviously quite a number of stages that are part of a professional post-production attempt.
POST-PRODUCTION PROCESS
Editing
Editing is the process of importing footage, making splices which allow the editor to remove unwanted takes, and then to assemble shots in order so as to make an effective presentation. Editors have access to editing programs of various designs. Some editing programs targeted for consumers, often offer features, such as a myriad of transition styles, which if they were used, would actually detract from the professionality of the final product. When it comes to editing, it is best to stick with simple cuts, and to try to migrate towards a professional editing program if your using an entry level program.
- Transcoding & Intermediate Formats – When you film a scene, the camera will record the visual and audio data to compressed files. The next step is to import the files for editing into the computer. The editing application has the ability to edit the files in their native form, but professionals often do one more step. They transcode the compressed files, or convert them to another codec, to an intermediate format, which is less compressed. By converting to an intermediate, effects work and colouring work can be done at a higher quality level, and the final export can maintain its quality. A common intermediate format is Apple Pro Res and that is available through Final Cut Pro. Another common intermediate format is Avid DNxHD, which is available on editing programs such as Media Composer.
Colour Correction
Colour correction allows the editor to correct problems with the image. For example, if the image is underexposed, you can pull up detail from the darks by increasing the brightness. Colour correction allows you to fix problems.
Primary Correction versus Secondary Correction
Primary Correction refers to changes that are made to the whole image. The goal is to ensure colour and contrast continuity, that is, to ensure that shot after shot are matched in colour and contrast. Secondary Correction is more specific than Primary Correction. Secondary correction refers to changes that are made to only a portion of the image. A mask is often used as a selection tool to ensure corrections are done only within predefined areas.
Music
Music is often a key component of a video project. A project usually needs at least one, but often a few pieces of music to create an impactful presentation.
The Master, The Backup and Exports
After going through time-consuming pre-production, expensive, challenging and labour intensive production, and thorough editing of a project, you want to make sure to save all of that work in the most optimum file container format. It’s best to export the final copy of the project to a high-resolution master file. That file, usually in Avid DNxHD or Apple ProRes, will preserve the quality of the work in a format that’s as close to uncompressed quality as possible, but without the huge storage requirements that uncompressed would require. Also, it is a good idea to make a backup copy, a duplicate copy of the master file. From this master file, most likely need to transcode to highly compressed formats for digital delivery on the web.
Recordings With Various Sound Levels
The image below is an example of the waveform from an audio file recorded on the computer. It is clear from the low amplitude of the waveform that the level of the recording was not set high enough during the recording. As a result, there is now space above and below the waveform that was not used. If the level had been set higher, more detail would have been captured.
The image below is of a waveform that has been recorded at a good level. Though there is enough detail in the recording now, there levels could still be boosted a bit more.
The waveform below represents a very good recording level. As you can see, the waveform is not clipped, but it is definitely using up most of the room available, and thus, capturing maximum detail. .
Lastly, I have included a clipped recording in this presentation to show you what not to do. Never record a waveform that looks like this image. The peaks are clipped at the top and at the bottom of the waveform, which destroys different parts of the sound.
Syncing Video and Audio
The editor can sync footage manually. The editor first finds the section of the take where the clapboard closes. The closing of the clapboard will produce a spike on the audio track, which will be very visible and very defined. The editor looks at the spike in the original low quality audio track, and then finds the same spike in the new high quality externally recorded track. The editor then proceeds to align the two audio tracks, by aligning the spikes of the two tracks.
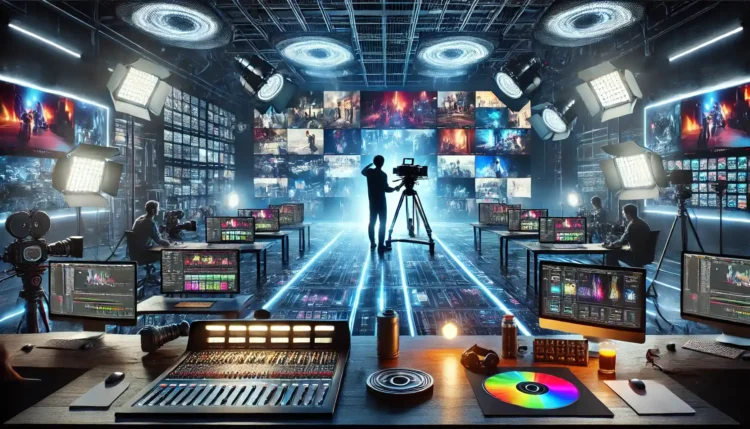
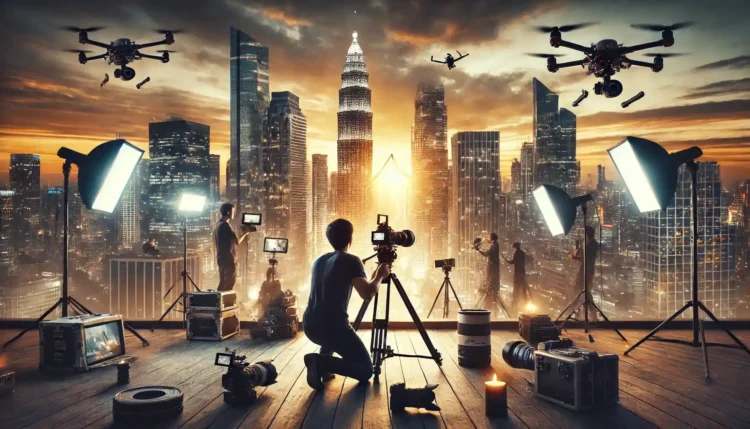

To see our Donate Page, click https://skillsgaptrainer.com/donate
To go back to our Home Page, click https://skillsgaptrainer.com
To see our Instagram Channel, click https://www.instagram.com/skillsgaptrainer/
To see our Twitter / X Channel, click https://twitter.com/SkillsGapTrain
To see our YouTube channel, click https://www.youtube.com/@skillsgaptrainer
To see some of our Udemy Courses, click SGT Udemy Page
“Discover the future of learning with Skills Gap Trainer, where technology meets art, and education transcends boundaries. Our innovative curriculum in AI, blockchain, user experience, digital marketing, and more, isn’t just about acquiring skills — it’s about mastering the art of possibility in a digitalized world. By linking to us, you’re not just sharing a resource; you’re igniting a beacon of knowledge that enlightens paths in technology, leadership, and beyond, for a global community of learners. Join us in our mission to bridge the skills gap and shape the future of education. Together, let’s empower minds across Canada, America, Europe, Britain, India, and beyond. Link to Skills Gap Trainer – where learning meets innovation, and every click opens a door to endless possibilities.“