Lecture 1 – Smartphone Video Production
SMARTPHONE VIDEO PRODUCTION
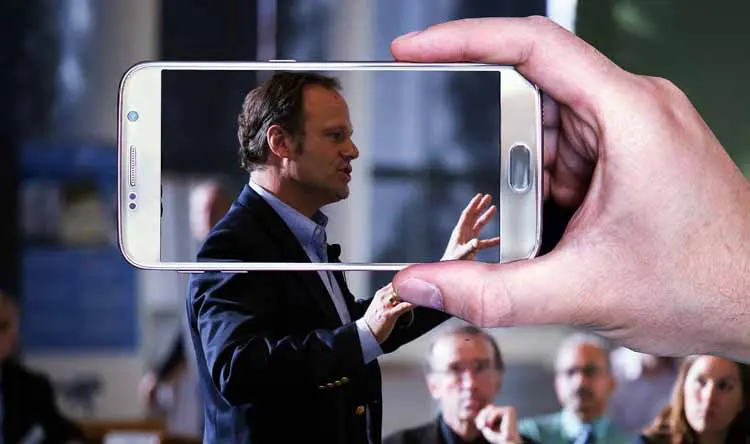
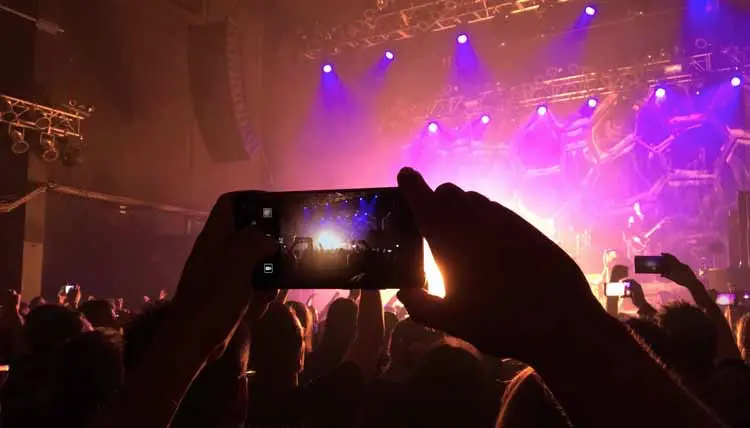
Are you interested in advertising your business, but are not sure what the most effective approach is or even where to begin? Do you have a limited budget or perhaps a limited amount of time you can devote to your business promotions? Most businesses have a website, but many are finding that it has become increasingly difficult to attract online traffic through traditional methods such as website content marketing and paid advertising. There has been a shift in visitor preferences recently. Many website visitors now prefer to consume “podcast style” audio content, and video content from social media platforms through their mobile video devices. Even search engines are showing their preference for video content through the fact that they allocate prime “screen real estate” on the front and secondary page search results to “video content” and through the fact that they boost website rankings of sites which contain videos. So how does someone with limited time, budget and resources use video to promote their business? No problem. A mobile phone is a complete media production machine that can be used to create outstanding professional videos for any purpose, and is very good for professional use as well. In this article, we will discuss how to use a smartphone to make great videos. We will cover the main concepts of planning, preparing the smartphone, lighting, audio recording and sharing the video online.
WHY VIDEO?
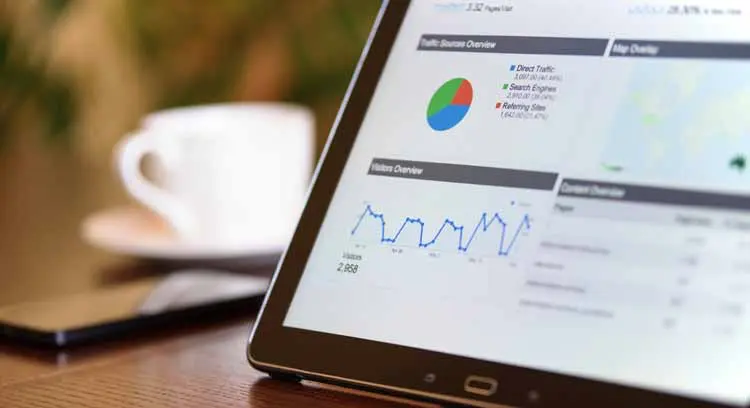
In the content marketing profession, the latest and most effective strategy has turned out to be video. If you ever take a look at the visitor analytics for a website, in the majority of cases you will notice that the type of technology which most people use to connect to the website is more often “mobile”, rather than “desktop” or “tablet”. The reason for this is three fold. First, the mobile device or smartphone features a small screen, which makes reading long articles difficult. Second, many times people are moving around with their mobile in hand and can only listen to audio or watch a video, but cannot read text while they are in motion. And last, people have a bit of an addiction with their mobile phone, which means they check the phone very often throughout the day; usually at any moment there is a slight pause in their daily routine. People consume videos in these breaks, as the videos are very effective at delivering complicated messages in an effortless manner and over a very short period of time.
A large part of the audience is consuming video on a mobile device as part of their daily routine. This audience would much rather see a sales video on a product or service rather than to read a text based presentation. A lot of visitors now use videos to make their determination as to whether they will buy a product or service from a company. This preference for video arose from the fact that there are simply too many text based websites on the internet and the information can be overwhelming. But for the businesses that go above and beyond, and use video effectively, this extra effort is rewarded. It has been found that a website page hosting a video can see about a 35% reduction in bounce rate. And in addition, conversion rates are higher for websites, which host videos. Unfortunately, video has so far been a complicated and expensive thing to produce, and as a result, many businesses have chosen to stay away and not create online YouTube style video pages.
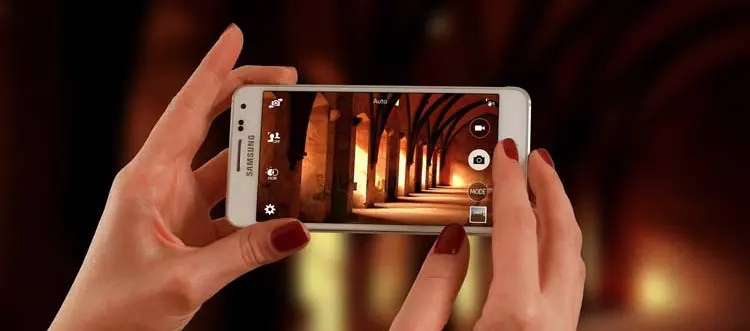
WHY USE A SMARTPHONE?
Have you ever thought about using your phone to produce video as part of your business marketing strategy? The smartphone is a complete production studio, and because of this, it can be used to enhance basic websites with video such that the sites engage better with the clients. The extra engagement leads to the conversion of more clients. Unfortunately, a lot of individuals have no experience or practice with video productions, and as a result don’t end up producing any video projects. This is a loss because of the high degree of relevancy that video plays in today’s online environment. The environment is filled with “centres of traffic” such as video hosting platforms, social media platforms and streaming film platforms. Perhaps one of the major reasons that individuals and businesses don’t pursue video is because they believe it is difficult and expensive. Though that may have been the case a little while back, it is no longer the case. A few years ago, anyone wishing to pursue professional video would have needed advanced video equipment such as; broadcast cameras, DSLR’s, mixers, electrical generators, XLR microphones, studio lighting, jib arms, dollies, tracks and other accessories. Nowadays, someone with a 4K smartphone, a $100 smartphone gimbal and a small battery powered LED light can make outstanding video works. Expensive equipment is no longer required to produce high quality footage that is at the level required for many different kinds of businesses. In addition, in terms of the production software, it has become more user friendly and intuitive. One can even edit an entire work on a smartphone, without the need for advanced and professional video editing software on the computer. Overall, the production of professional looking videos is quite simple these days.
LEARNING

Just having a smartphone will not guarantee that you will be able to make a good video. Even though smartphones are simple, there are features that are “hidden” or “not immediately obvious” which can make a big difference when shooting with the phone. For example, some phones may be set to HD mode, and the 4K setting may be buried in the settings. Without setting the phone to 4K, the footage shot will not be “future proofed”. Without tinkering with the features of the phone, one cannot guarantee to be able to control the phone as needed on the day of filming. In order to shoot well, a little bit of time must be set aside to understand the phone settings. In addition, time will also need to be set aside to understand photographic concepts such as composition and lighting.
PLANNING

For anyone who’s ever produced or filmed or made any sort of edited video, they understand that half the battle is fought before production or post-production even gets underway. Pre-production is one of the more important stages of production, because getting it wrong can stop a project in its tracks. So what is pre-production? It essentially refers to the planning stages of your project where you are doing things such as storyboarding, shot lists, blocking diagrams, scouting, rehearsals, scheduling and so forth. The more time that is spent in the planning phase, the more smoothly the shooting and editing phases will go. A lot of time spent up-front will ensure that less time needs to be spent on the day of filming or during the editing process. For example: During the actual production, everyone will need directions. Spending time to communicate the vision to the team on the day of will take away from the efficiency of the production endeavour. You will still need to spend some time to consult everyone in regards to the production day, but anything you can do to increase your communication effectiveness and speed on the day of will help. For this reason, planning documents such as storyboards can help to communicate the vision to the team while you as the director can focus on other aspects that need to be completed. Storyboards are simply a set of diagrams that show the video sequence shot by shot. The crew and/or production assistant will need a copy of the script. Another essential document you will need for the production is the script. The script can be formatted in a two-column approach, an image on the left and the script line on the right. Both the crew and the cast will need a copy of the script. Irrespective of the kind of video you set out to make, the process of planning will be the same.
LOCATION
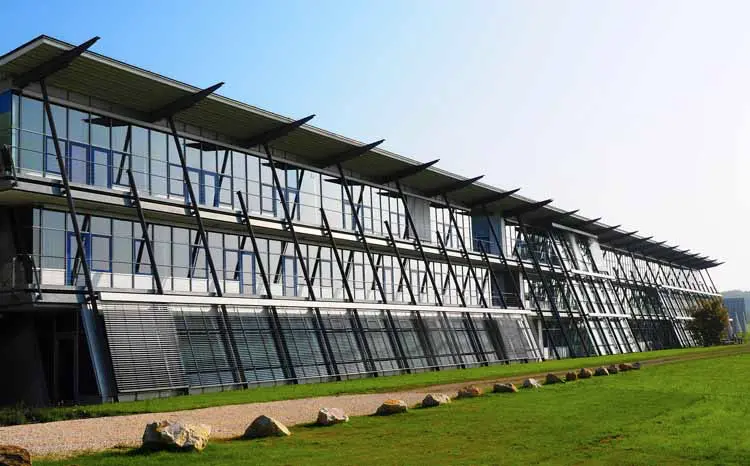
Location, Location, Location!!! Before you go to film anything, you want to check out different locations. Being able to find and then to secure a quality location can make you look like an excellent filmmaker. The qualities of the scene have a profound impact on the image that is eventually recorded. Location is very important and will either make or break the visual aesthetic of the scene you will eventually record. For example: If you film in a high-end corporate building or a high-end restaurant, your project will likely come off as having been produced by a quality filmmaking team. However, if you film in a bedroom filled with clutter and do not even bother to set the scene with props or carefully chosen furniture, then no matter how many lighting effects you add to your scene, the production will likely look uninteresting and be regarded as unimpressive. In the latter situation, the audience will not be impressed with the visuals, and therefore, are likely to also not be impressed by your talents as a media producer. In addition, the location also matters in terms of the audio side of things. The mobile microphone on the smartphone or on a dedicated external recording unit, are not able to cope with noise heavy environmental sounds that occur at some locations. So if it’s a windy location, or if there are people making noise nearby on a regular basis, than that is likely not a good location. But if you find a location that is likely to be quiet, such as an indoor space, you will increase the audio recording fidelity dramatically.
Choosing the wrong location can be troublesome and even disastrous for the shoot. There are many ways in which choosing the wrong location can impact, interfere or stop your shoot. If you film on a busy street, the cops may pay you a visit. If you film in an indoor tennis court facility, the fans supporting the dome will cause enough sound to ruin the recording. If you film outside in the forest on a cloudy day, the lack of sunlight will ruin the cinematic appeal of the shots, and you will be tempted to use powered lighting. The requirement of a lot of power will require a generator, and this in turn will ruin your audio track. Simply put, you want “cinematic” areas that aren’t going to cause any problems or physical interferences or audio issues once you begin the days shoot.
When you need to shoot indoors, the best thing to look for is simple visual layouts. You want to avoid having numerous physical objects and clutter on scene that break the nice cinematic lines and that break the colour scheme. You want an area with little or no clutter in the background. However, a trip to pick up carefully selected decorations from the local thrift store could make the set more cinematic. The difference between a well-shot video and one that looks amateurish often comes down to details such as set decorations and/or the amount of on scene non-visually aesthetic clutter. Good locations for indoor environments are school buildings and office buildings on carefully chosen dates, seeing as though these places are usually free of noise and people at certain times. When you need to shoot outdoors, you will need to watch but also to listen to the noise level at each potential location that you visit. The forest might look great, but if it generates a lot of wind noise, it will not be useful to record dialogue in such an environment.
Lecture 3 – Pre-Production (Part 2 – Storyboard, Preparation, Equipment)
STORYBOARD
Putting in a little bit of time on location or at the office, to figure out the shot combinations for the storyboard, will significantly increase the chances of shooting great shots on the day of filming. If you don’t plan out every single shot, you will have to film many more takes on the day of filming so as to ensure that you have enough takes that you can put together a usable sequence in the editing. However, once you start editing, you will then realize that the amount of shot combinations you will need to compare to make a great edit expands exponentially. It’s important to plan the shots ahead of the shooting day to avoid these kinds of problems. Don’t settle for mediocre shots, plan and take good ones!
PREPARATION
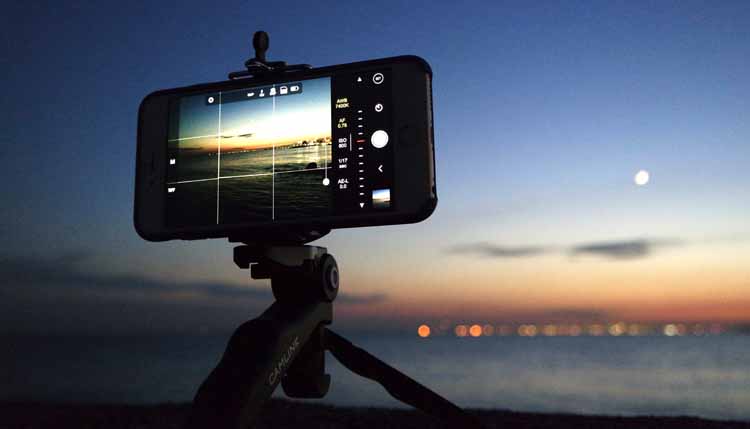
Once all of the planning – the props, documents, crew, equipment, actors and locations are set to go, you have to make sure to set the camera to record in the appropriate settings. Set the camera to 4K recording resolution, which is going to be either 3840 x 2160 or 4096 x 2160 pixels. Though many viewers are still utilizing high definition screens with a resolution of 1920 x 1080, within a few short years, many viewers will own a 4K capable display. It is a good idea to future proof the footage you get today, so as to ensure it displays at the best quality level given the display that is used in the future. The next thing to do is to ensure that there are no apps running open in memory. You want to bring your smartphones resource utilization down by closing all unnecessary apps down. In addition, 4K footage will take up a lot of space, so you want to make sure to free up as much storage space on the device as possible by copying all unnecessary or non system critical files to the cloud or to offsite storage on the computer.
CAMERA APP
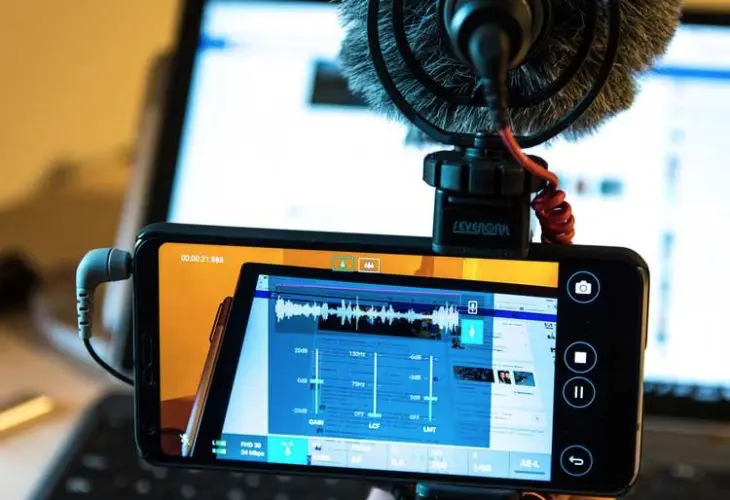
Smartphones come with a default camera app installed. In most instances, the default camera app should suffice. Unfortunately, the default camera app does not usually provide the user with fine control over camera recording parameters, and as such, will limit the ability of the user to record different scenes professionally. Though both the default camera app and the more professional camera app variants have access to the same underlying hardware, the professional camera apps can be thought of as an “unlocked” camera apps that allows customization of recording parameters. The professional apps give you control over things such as focus, f-stop, resolution and even fine-tuned audio controls. An example of a professional camera app used by filmmakers is Filmic Pro. Filmic Pro provides for manual camera control that may not be possible with the default camera app.
EQUIPMENT
Though it is possible to produce a video from start to finish on a smartphone, using only the phone will somewhat limit your ability to create the best possible work. To produce the best possible video, you will need a few accessories. These will include a power cable for the phone, a battery charger for the phone, a tripod, a set of headphones, lights, a professional camera app, an editing app or professional editing software installed on a computer, and a lavalier or shotgun microphone.
BACKDROP

The difficult aspect of recording presentations usually lies in the fact that you need to find and book a location, to stage it with items relevant to the video, and then you need to do a complicated lighting setup. One possible solution to this is just to use your living room and to install a solid white or solid black backdrop. This is a great solution if you don’t have a lot of space or a lot of money to spend on the project. Usually lighting a simple white or black background does not take as much of a lighting setup as would a green screen or an actual physical set. The white or black background will provide a solid professional shape behind your presenter and will make your video look professional.
BATTERY
Many smartphones will not last for a full day of production. Production days usually go on longer than people expect. In addition, taking 4K-video is battery intensive and will quickly drain the battery. Having a battery pack that can quickly recharge your phone will allow you to continue shooting whereas otherwise you would not be able to complete the shoot. A permanent backup battery charger for the phone is essential.
CAMERA LENSES
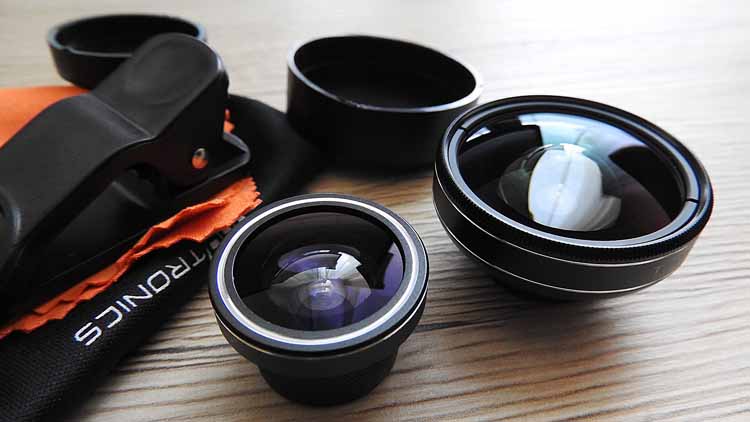
Smartphones can shoot high quality footage due to the ever-increasing sophistication of the electronics and improvement in the quality of the optics. Features such as High Dynamic Range, High Efficiency Video Codec, 4K, optical image stabilization and so forth have brought up the level of smartphone technology to the professional level. However, due to the physical size constraints placed on the lens system, most smartphones have ended up with only one wide-angle look. This limitation to using only a wide-angle lens results in imagery that looks the same or similar from shot to shot. To compensate for this, lens manufacturers have released supplemental lens add-ons that can be clipped onto the smartphone body. These supplemental lenses cover the regular lens. For example, a telephoto lens attachment could be used to increase the ability of the phone to zoom in on a subject optically, and thus not lose any visual quality that one would lose with a digital zoom.
DIGITAL ZOOM
Video cameras and DSLR’s are designed to zoom in and out optically. The front of these cameras is packed with lenses, which move back and forth as needed, to achieve the desired amount of zoom. In contrast to this, cell phone devices are very small, and though they provide enough space for a small digital camera sensor to be installed, they generally do not provide enough space to allow for multiple lens elements to be included as well. As a result of this physical constraint, many manufacturers have instead equipped the phones with digital zoom. Digital zoom is a form of digital picture enlargement, rather than actual physical optical enlargement. The digital zoom is done in software rather than by mechanical hardware bits. The software enlarges the picture, but the clarity overall is degraded and areas of noise or pixelated blurs show up.
If you do not have optical zoom, it can be enticing to use the digital zoom. Avoid this temptation. If you need a larger image, consider walking closer. In addition, the actual zoom should never be recorded on the camera. Recording the process of “zooming in” or “zooming out” as part of the take is a sign of an amateur video maker.
STABILIZERS
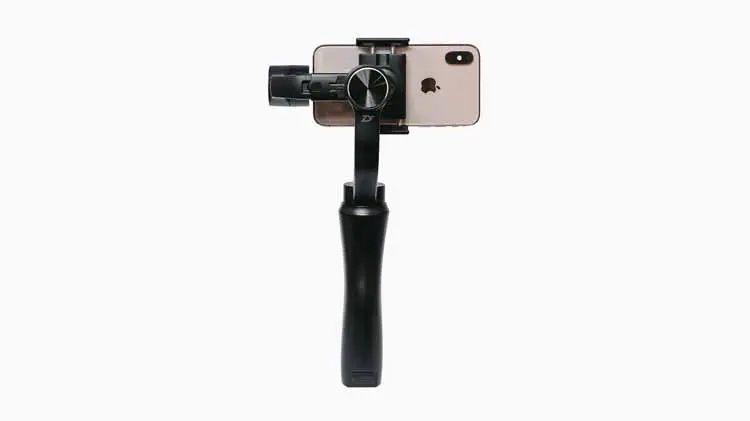
If you’ve ever tried to film with a smartphone, you may have realized that it is very difficult to film smooth takes. This problem is further amplified when moving about and filming. Because the smartphone is usually operated by hand, the footage comes out shaky. In addition, the small size of the sensor amplifies the perceived shake of the footage. A good solution is to stabilize the smartphone with some accessory equipment.
Tripods are an essential piece of equipment that video producers use to support the camera. Tripods allow video makers to take cinematic shots. Without the use of a tripod, the camera would have to be supported by hand, and this would not yield a professional result. Handheld footage really is too shaky to be used for professional works. Some people might assume that the optical image stabilization on the smartphone would provide for enough stabilization, that the camera could be used on professional projects in handheld operation, but this is not the case. Optical image stabilization does help, but it is not adequate enough to compensate for shake when the camera is operated handheld. To attach a smartphone to a tripod, one will need to purchase a special ‘holder case’, or a “special tripod mount” which holds the phone and has the necessary screw mount to attach to the tripod.
Gimbals are an excellent solution to capturing motion while moving about with the camera. A gimbal is probably the best option for recording pretty much any type of motion. You can walk around with a gimbal/smartphone setup and follow moving subjects or objects, while at the same time producing very stable footage.
Lecture 5 – Production (Part 1 – Camera Techniques, Lighting Techniques)
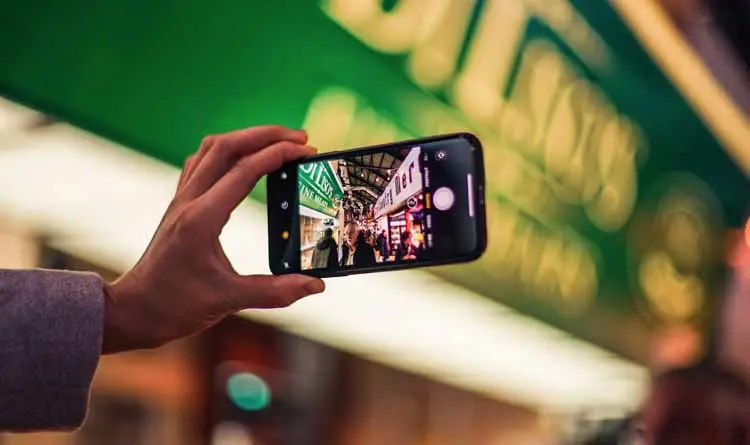
HORIZONTAL
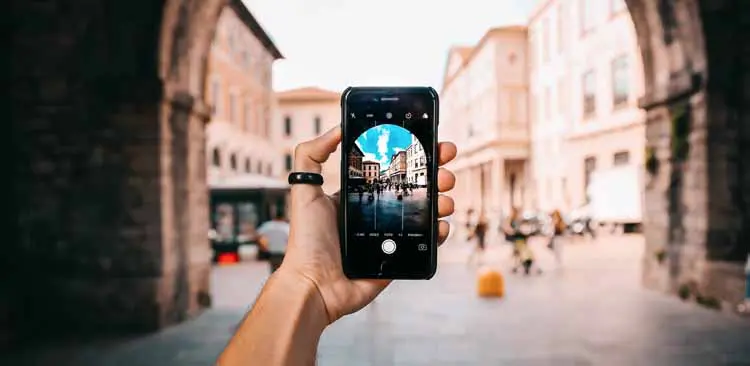
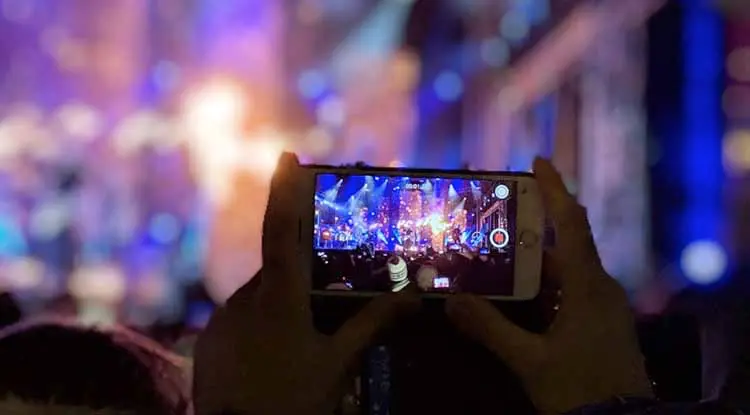
Some videographers use smartphones take portrait shots of themselves or others with the phone in a vertical orientation. Meaning, they hold the phone in the “up and down” position as they record. Tough the footage will look fine on the phone, when displayed on any other device, the video will display with black bars on either side. The problem is that virtually every display device there is has a “landscape” orientation. You should shoot with the phone held in the horizontal position such that the footage will appear like it fits the widescreen frame of any device that footage is displayed on.
RULE OF THIRDS
The “rule of thirds” is a popular photographic principle, which if used correctly, can make your image or video look more cinematic. Some smartphones have a feature built in which makes it easier to capture an image according to the “rule of thirds”. The feature involves the ability to turn on a set of “gridlines”, and to use these grid lines to divide the frame up into thirds. The lines show up both horizontally and vertically, and they divide the image into nine squares. The photographer then uses the guiding lines to frame the scene. Objects or subjects are placed at points of intersection or along these lines, and a more professional looking image should result. The rule of thirds is most easily visible when actors are placed on the left side of the screen or on the right, rather than at the center.
LIGHTING
The key to filming a professional video lies with the lighting. Lighting happens to be the most underestimated task in the production process. But in reality, filming with good lighting setups can lead to the creation of videos that look like cinematic masterpieces. Lighting isn’t only used to brighten the scene, but it can also be used to accentuate certain details in the frame, expose the background for the creation of some depth and to create the desired atmosphere and mood. When lighting a scene, you want to make sure there is sufficient brightness so that the camera does not expose a grainy image. You need to check the exposure level on the foreground, but also on the background, where grain may start to appear. You want to emphasize certain sections with shadows and other sections with light. Sometimes inexperienced lighting designers remove all the shadows and light everything, and this is usually a mistake. One can also light a subject from the rear, which will make the subject stand out or “pop” from the frame, therefore creating some cinematic depth. At the same time, you don’t want the camera facing light to throw light into the lens, so be careful not to film into any lights. Lighting is essential in filmmaking, but it is especially essential in smartphone videography. The smartphone video maker has only a very small image sensor in their phone’s camera, and this places some constraints on the cinematic quality of the footage. To enhance the “cinematic quality”, one needs to colour the scene with light in such a way so as to make the footage appear more “film like”.
When filming outside, there is a lot of available natural light, and this really helps the smartphone to expose scenes properly. However, one has to be careful on very bright days, as strong sunlight can create some harsh shadows. Generally it is easier to film on cloudy days where the light is partially diffused by the clouds. However, once you gain experience, the sunny days of the summer season can really light certain areas cinematically, so it is good to also attempt to film during such times. Other great times to film are during “golden hour”. Golden hour happens in the morning or evening, when the sun rises or sets, and this is where the low angle of the sun can create really beautiful and cinematic lighting effects. When dealing with the fact that light only comes from one direction when the sun is up, it is best to bring along a lightweight and portable reflector or two, and they can be used to change the angle of light as needed for the production.
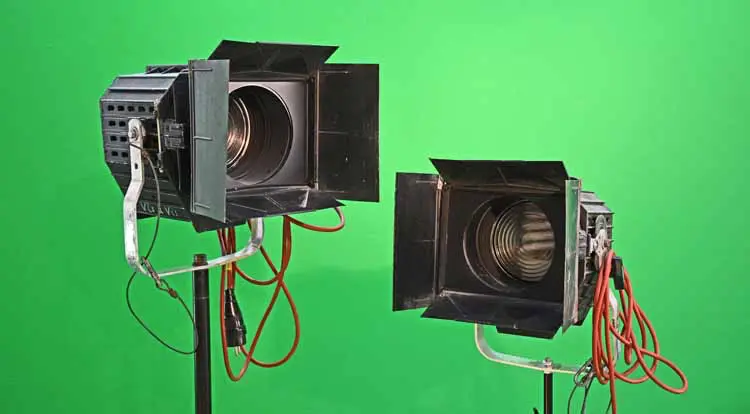
When filming inside, there is usually less available natural light, so the smartphone generally has a tougher time with the lower light levels. To compensate for the lower light levels, adding powered lights will fix the problem. To light a person, at least two lights will be needed. One light will be aimed at the subject, and this will be the main light illuminating the subject. A second light will need to be positioned at 90 degrees to the main light, so as to fill in the shadows that the main light creates. The key is to not remove all the shadows on the subject, but to lessen the harshness and intensity of the shadows, while allowing some shadow-created texture and detail to remain. One thing to be careful of when lighting a person inside a building, is the lighting effect or the lack of lighting that can occur around the eye socket. Overhead lights shine directly down and can create some shadows in the eye sockets. Your main light has to be positioned well enough and close enough such that that kind of eye shadow disappears. Another thing to be careful of are windows. Filming a scene with light that comes from the window in concert with powered lights is referred to as mixed lighting. This can create visible distortions of colour temperature within the scene. Balancing the outside light with powered lights, such that the scene appears as if it has matching colour temperatures throughout the image takes some practice. One easy trick is to place a diffusion material over the window, or simply close the curtains, to reduce the effect that exterior light is having on your lighting setup. Then focus on lighting the character with your own lights and then you won’t have to deal with mixed lighting. However, if you want to use the light from the window, attempt to place the subject facing the window, rather than facing away from the window. Then make sure you don’t film into the window since that will make the character into a dark silhouette, but film the subject from the side, where the window is not in the shot.
Part of the key to filming professionally is to light a scene with professional lights or to be flexible with the nature and type of lights used. By being creative with the lighting process and the technologies used, you can achieve a professional result. You can use many kinds of lights, not just professional studio lights. You will lose some fine control and a bit of light quality, but with hard work and many hours of lighting, you can pull of a great scene. You can use flashlights, lamps, smartphone lights, and even work lights. You can buy work lights at the local hardware store that have LED light option, or you can buy the older and inexpensive “halogen” work lights and swap out the hot halogen bulbs for a modern LED bulb. Work lights throw out a lot of light and can be used to create a general light level as well as to light larger areas such as the backgrounds. If you have no budget whatsoever, you can always use the sun, and perhaps some tinfoil to make a reflector, and this will provide you with greater control.
AUDIO RECORDING
A video is essentially a combination of a video track and an audio track. Many individuals new to video production tend to automatically put in more effort on getting the video track right, but neglect the audio track. This preference or tendency comes from the misconception that most people have, that video quality is what determines the success of a project, not the audio quality. In reality, you can have a video be made with mediocre visuals, but as long as the audio is clear and professional, the project is likely to succeed and may even get great reviews. On the other hand, if you have a video that looks like a cinematic masterpiece, but the audio is full of flaws and noise, it will not be viewed by anyone. The success of the video will depend more on the level of quality of the audio track, than on the level of quality of the video track. Audio is more important than video.
The first aspect of recording good audio deals with understanding the impact of environmental sounds on the recording. Checking the audio is a necessary step because in the majority of cases, there are environmental sounds that reveal themselves in the audio recording, that may not be immediately obvious.
For example, when shooting outdoors, a strong wind could brush against the microphone diaphragm and create a wind sound throughout the entire track that will be impossible to get rid of. Using a wind cover or wind muff in such circumstances is necessary. You will still need to monitor the audio as you record it. Most recording setups allow you to monitor the audio in real time. If you cannot monitor the audio in real time, then at the very least you will be able to check the audio by playing it back.
The second aspect of recording audio deals with understanding the effect of microphone placement. Generally, you want to place the microphone as close as possible to the sound source. If the microphone is not near the sound source, the extra distance will not allow the microphone to pick up a sufficient and optimal level of sound. The sound levels drop off dramatically quite fast as soon as you distance the microphone a bit from the sound source. Professionals place a directional microphone close to the audio source. They also plug the microphone into a separate recording device. In some instances, when the quality of the microphone is really good, they may plug the microphone directly into the camera rather than the external recording device.
The third aspect of recording good audio has to do with using a good quality external microphone. Smartphones are always improving on the technical specifications of the video capture; larger frame sensors, faster frame rates, higher fidelity colour, brighter lenses and so forth. However, even the latest smartphones are neglecting the importance of including a high quality capture microphone. All of the smartphones include inexpensive omnidirectional microphones. These microphones end up capturing all of the sounds on scene, even sounds you don’t want, such as the air conditioner, the wind, the fridge, the neighbours and cars nearby. These sounds are impossible to remove once they are embedded within the audio track. In addition to the poor quality of the smartphone microphones, the smartphones also capture the phone handling noise. A good solution for these types of problems is to use both a tripod and an external microphone. Using a tripod will help the camera operator to avoid handling the camera directly. Using an external microphone will improve audio dramatically. A good external microphone to use is a lavalier microphone. This is a small microphone that clips on to a shirt and plugs into the headphone socket. Or alternatively, you can also use a shotgun microphone. This type of microphone is useful because it captures only the sounds you want in the recording, rather than sounds from all directions. The shotgun can be used from a longer distance from the sound source. Additionally, directional microphones have a narrow capture, thus they are better able to filter out unwanted noise from the sides of the sound source.
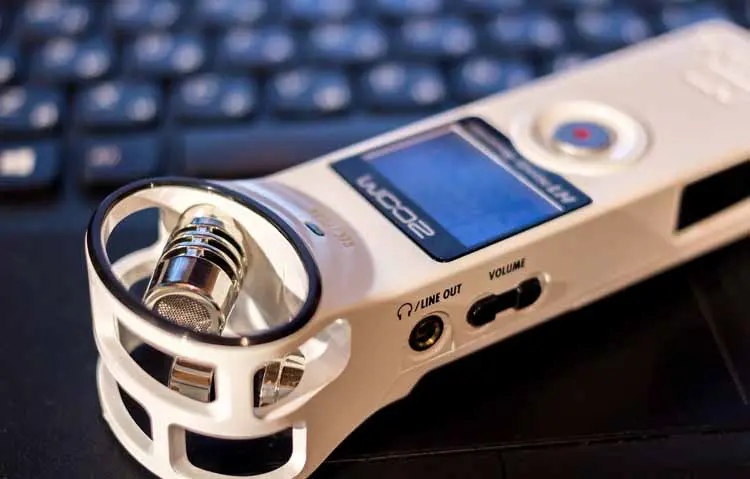
The fourth aspect of recording good audio deals with understanding the need for external audio recording devices and incorporating them into the production process. Professionals don’t just use a smartphone to record for video and ignore the other critical lighting or audio requirements. Specifically, though they use only a smartphone for the video, they still use what is needed as part of the required audio equipment. Professionals used portable recorders such as the Zoom H6n, Zoom H4n or Zoom H1n. After recording with a portable recorder, you will need to bring the files from the external recording device to the computer. Next, you would sync the external recordings with the smartphone video files, and replace the smartphone audio with the higher quality external audio files. Professionals usually plug in a lavalier into a device like the Zoom recorders. A lavalier such as Rode SmartLav+ is much better than the smartphone microphone. This kind of microphone can even be connected to the smartphone input, and the quality will suffice. Though the lavalier is an omnidirectional microphone, it records so close to presenters’ voice, that it effectively screens out a lot of environmental and background noise. Professionals also sometimes need to record two people. In such a case, rather than mixing two microphones together, you might consider using a shotgun microphone. Shotgun microphones also have the added advantage of allowing you to place the microphone a bit further back, thus keeping it out of the frame.
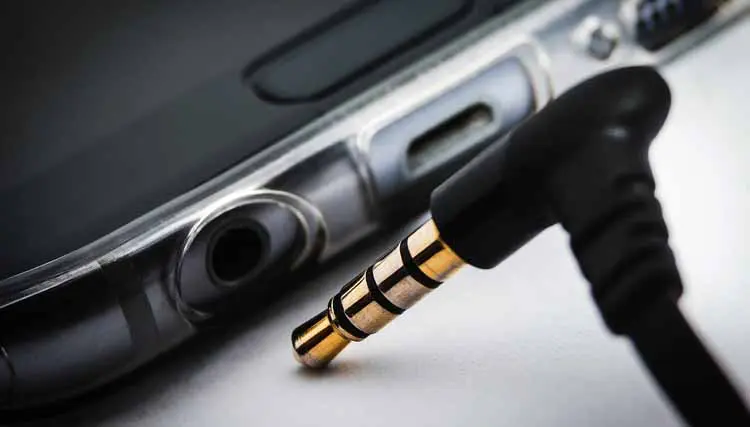
One other thing to watch out for has to do with the connector type on professional microphones. If the microphone is professional, it may not be specifically designed to work with smartphones, and may come equipped with a TRS jack. Smartphones have TRRS jacks. You will either need to get a converter, or a microphone that is specifically designed to work with smartphones. In addition, don’t forget to have a headphone splitter on hand so that you can monitor the recording.
RECORD
After the camera related equipment and lighting equipment has been set up with the appropriate levels set, the last thing to do before commencing the actual recording is to make a practice recording. The practice recording allows you to test the visual and audio quality of the environment, before making the presenters act out the scene only to find out there is some technical production error in play. In addition to monitoring the video of the test recording, make sure to not forget to monitor the audio as well. You will need a headphone splitter to monitor the recording, and this device will allow you to plug in the headphones and microphone at the same time into the smartphone.
EDITING
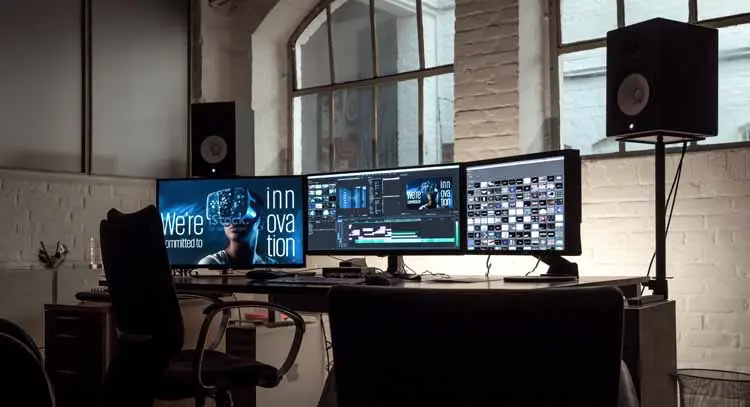
The purpose of editing the video project is to take all of the shots and media elements that are created in the production, and to assemble them into a “polished” video that can be distributed online. The video clips shot on the smartphone need to be imported into a computer, placed on a timeline, and then the individual clips need to be trimmed, enhanced, titled, graphics added and sound added. In the timeline, you will be able to create a story of clips and the overall sequence will then appear to have a professional narrative. Though it is possible to do this on a smartphone, this is only a good idea if you have a small number of clips. For shorter videos, it is possible to make basic video sequences on the phone. However, for a complex project that has many video clips, it can be hard to organize and edit a big project on a phone. That’s when you want to use a computer and professional applications that do not constrain your ability to put together something really impressive. If you are using a PC, a free editing program is Lightworks. There is also a professional application called Adobe Premiere Pro. If you are on a budget, you can try Adobe Premiere Elements. As for Apple computers, a good choice is obviously iMovie or Final Cut Pro for the power users. Working hard to edit well can make a big difference in the outcome and appeal of the project.
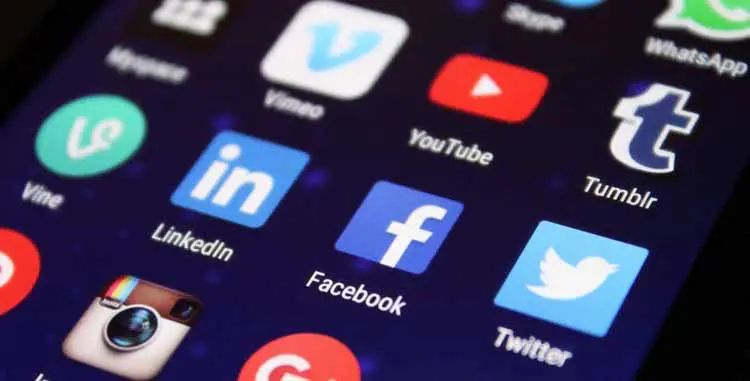
SHARING ON YOUTUBE

YouTube is a very large video search engine with over a billion users. The YouTube video platform is a superior way to present information about your business than the traditional way involving the writing of articles on your website. There are simply too many websites indexed by Google nowadays with too much information, so it is almost impossible for a new website to cut through the excessive amounts of information and noise on the net so as to get indexed on the front page of Google search results. Since fewer businesses market on YouTube, and since making videos are generally harder to make than writing articles, there are fewer number of competing videos on any given topic. So what to post on YouTube? Many people search for educational videos, videos by experts and how to guides. Making an informational video like this makes your business the expert authority on the subject, which eventually leads to social proof, customer trust and sales conversions. As the YouTube videos you upload get hits, they may even end up on the front page or second page of Google search results.
After you finish shooting the video with your smartphone and editing your video, you will need to distribute it. The best places to distribute it are your private website, social media and YouTube. It is best to host the video on YouTube, and then to embed the clip into your website, rather than to host the video directly on your own web server. It is a bad idea to tax and use web server resources for video distribution, as that can either overload your server or slow it down for other users who may be trying to access simple items such as web articles. Some people underestimate the power of YouTube and upload on other platforms. One study we found showed that the website which hosted a YouTube video was 53x more likely to show up in Google search results. Another study showed that there could be up to a 35% reduction in page bounce rate for article pages which host YouTube content. Therefore, YouTube distribution is an essential SEO mechanism for private web businesses and should be used to distribute your videos.
CONCLUSION
Your video needs to look professional in order for it to succeed as a promotion for a business or for any other reason. Today’s smartphones can meet this need. Though today’s smartphones can handle the complete production pipeline, from shooting through to distribution, they do have some limitations when it comes to audio recording and lens design constraints. Thus, we recommended taking a few extra steps with the incorporation of some intelligent well-chosen accessories as part of the production process. In addition, smartphones are also always with you, providing you with the advantage to capture all of the important moments as they arise. Smartphone can be used to make high quality professional videos on the cheap, and as such, this type of micro equipment style video production is here to stay!
To see our Donate Page, click https://skillsgaptrainer.com/donate
Support the future. Support Skills Gap Trainer Communications.
To go back to our Home Page, click https://skillsgaptrainer.com
To see our Twitter / X Channel, click https://twitter.com/SkillsGapTrain
To see our Instagram Channel, click https://www.instagram.com/skillsgaptrainer/
To see our YouTube Channel, click https://www.youtube.com/@skillsgaptrainer
To register in some of our Udemy Courses, click SGT Udemy Page
“Discover the future of learning with Skills Gap Trainer, where technology meets art, and education transcends boundaries. Our innovative curriculum in AI, blockchain, user experience, digital marketing, and more, isn’t just about acquiring skills — it’s about mastering the art of possibility in a digitalized world. By linking to us, you’re not just sharing a resource; you’re igniting a beacon of knowledge that enlightens paths in technology, leadership, and beyond, for a global community of learners. Join us in our mission to bridge the skills gap and shape the future of education. Together, let’s empower minds across Canada, America, Europe, Britain, India, and beyond. Link to Skills Gap Trainer – where learning meets innovation, and every click opens a door to endless possibilities.“